Showing posts with label seafood. Show all posts
Sunday, September 8, 2013
Asari No Sakamushi
One of my favorite childhood foods was clams- pretty much in any form but fried. When we were living at Yokota Air Force Base outside of Tokyo, my parents would take me to this small Japanese restaurant where I would eat bowl after bowl of miso soup laden with teeny-tiny clams the size of a nickel called shijimi. I see miso soup with clams on menus here in California but never with the wee clams that I had in Japan, instead a bigger, slightly briny clam called an asari (Manila clam) is used. On a trip back to Japan a few years back, my friend Mayumi, took me to the Tsukiji market at the crack of dawn and lo and behold they had my clams...the tiny ones! We bought a big bag...the fishmonger even gave us the "bijin discount" (the pretty girl discount) and Mayumi's grandma was kind enough to cook the clams for us for dinner. It's crazy how little things like that can bring you such happiness.
Even though, I can't get my hands on the itty-bitty shijimi clams here I do get some pretty small clams at Sunh Fish and at Oto's from time to time to make asari miso soup with. If I'm feeling particular grown up, I'll make asari no sakamushi (Manila clams steamed in sake). You usually can find this dish served in izakayas (Japanese pubs). The dish requires very few ingredients and minimal work. Mr.S. isn't too crazy about it...he tends to like his mollusks immersed in butter and garlic but the simplicity of the dish suits me just fine especially on nights when I don't want to spend too much time fussing in the kitchen. A bowl of asari no sakamushi, a glass of white wine and I'm set.
Asari No Sakamushi
Ingredients
2 lbs. asari (Manila clams), scrubbed well
sea salt
1 cup sake ( I used Sho Chiku Bai)
4 tablespoons mirin
1 cup water
2-3 scallions, thinly sliced (white and light green parts)
Instructions
1. Place clams in a colander or a wire sieve. In a large bowl, add one tablespoon of sea salt and fill with cold water. Submerge the colander of clams into the salty water. (Make sure all the clams are covered with the salty water.) Leave in a cool place at least two hours (or up to overnight). The clams will spit out the sand and the sand should fall to the bottom of the bowl. Sometimes if there seems to be a lot of sand, halfway through I'll change out the salted water.
2. Drain the clams and rinse them well. Sometimes if they look a little bit janky, I'll use my scrub brush on them at this point. Throw away any clams that don't close.
3. In a large, deep pan- combine the sake, mirin, and water. Bring to a boil then reduce to a simmer. Add the clams. Cover the pan.
4. Give the pan a good shake every so often. Cook, roughly 4-5 minutes, until shells open.
5. Discard any clams that refuse to open. You do not want to eat those.
6. Garnish with scallions.
* If you want to add a little more kick, sprinkle some togarashi on the finished product.
Tuesday, August 27, 2013
Ingredient Spotlight: Kewpie (Creamy Shrimp and Avocado Salad)
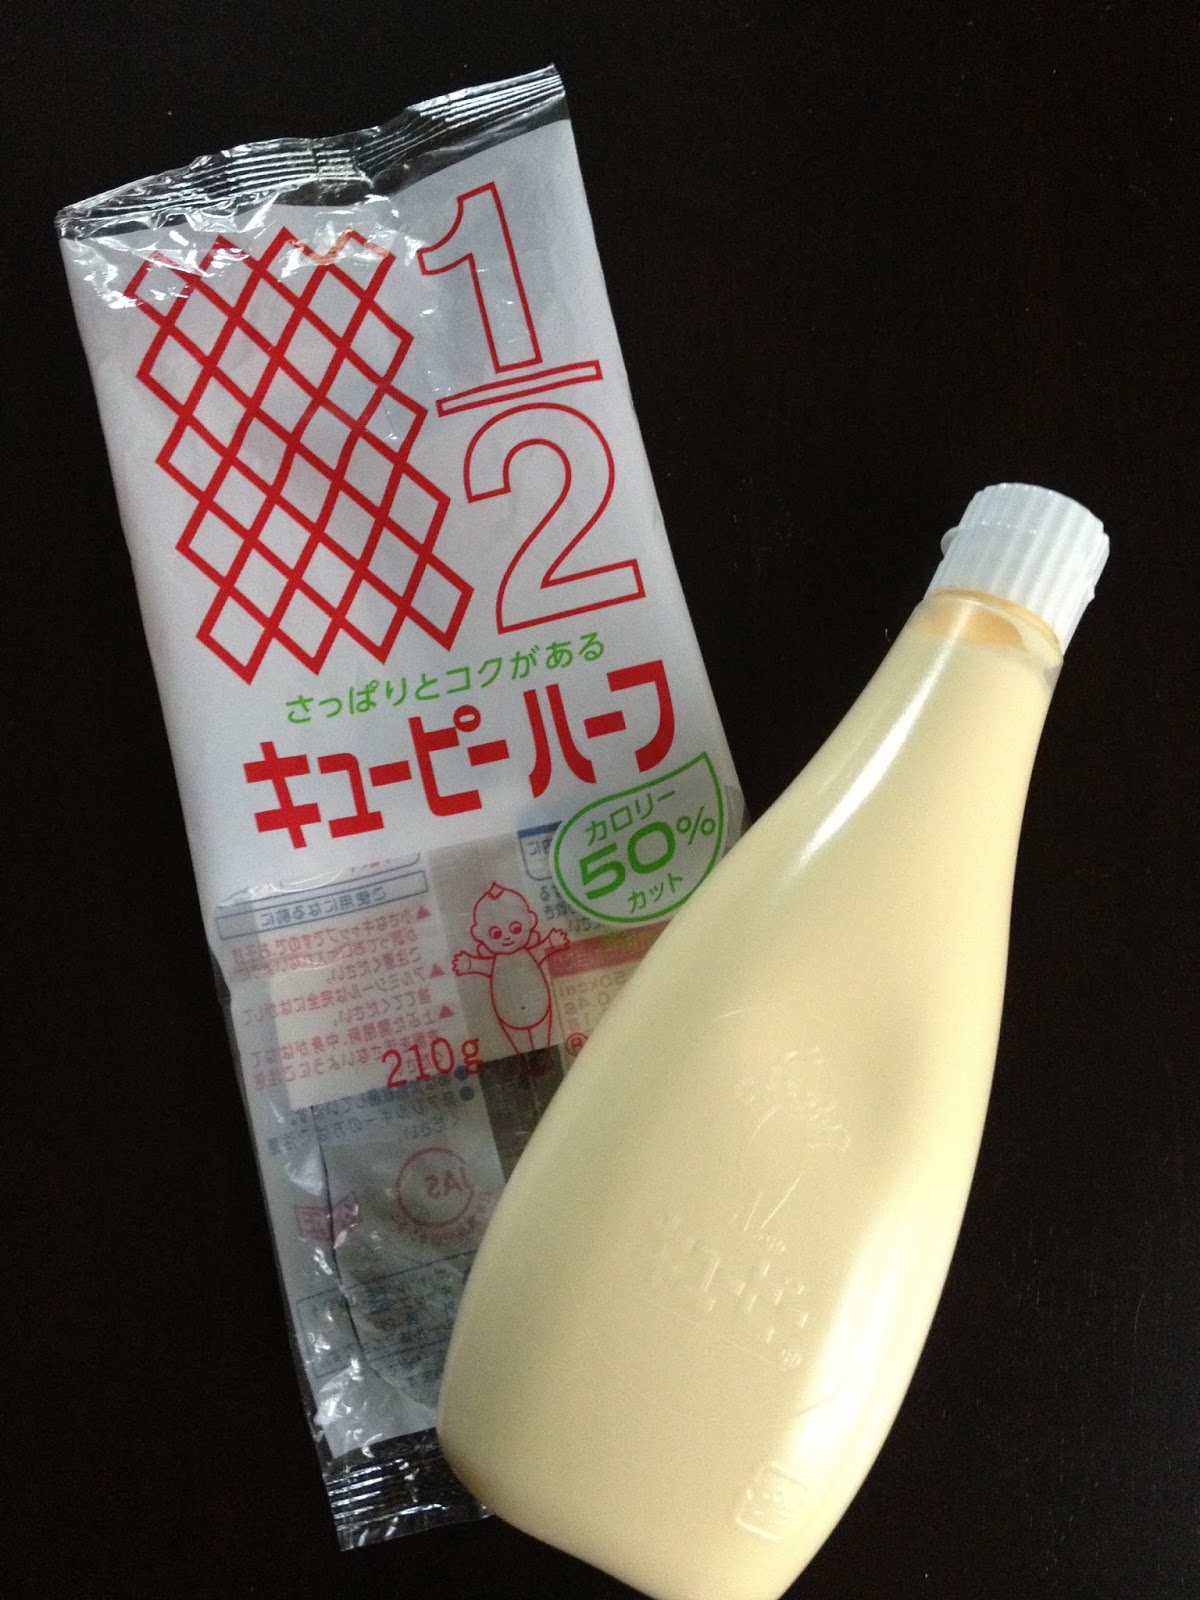
I'm not much of a mayo girl. Usually if a recipe calls for a hefty dose of mayo, I'll sub in Greek yogurt. I never, ever go the Miracle Whip route- that stuff tastes vile. Anyhow, once in awhile I'll get a hankering for seafood salad- you know the goopy, white stuff with chunks of veggies, shrimp and crab? When I do, I opt to make it with Kewpie. Kewpie mayonnaise is a Japanese mayo that's been around since the mid 1920's. It comes in this weird squishy bottle (that kind of reminds me of a colostomy bag) with a creepy, open-armed, naked baby as its logo. Despite the odd packaging, I've been eating the stuff for years. My mom used to make Japanese potato salad with it when I was a kid (in fact I nowadays I still prefer my potato salad with Kewpie over the standard mayo). To me Kewpie has a much smoother, creamier texture than Best Foods or Kraft and tastes less eggy (they use twice the amount of egg yolks). Also it's made from rice vinegar as opposed to distilled vinegar, so it imparts a slightly sweeter taste. Kewpie also has a bit of umami to it, making it great for incorporating it into a variety of dishes. I've used it in deviled eggs, in oyster motoyaki and drizzled on okonomiyaki. If you like mayo with your artichoke, asparagus or French fries, try switching it out for Kewpie. You won't go back. Additionally, if you mix it with sriracha, it makes a fantastic spicy dipping sauce.
Creamy Shrimp and Avocado Salad
Ingredients
1/2 lb. of cooked, medium-sized shrimp
5-6 cherry tomatoes, sliced in half (optional. I skip this sometimes as Mr. S. is not a raw tomato fan)
1 firm but ripe avocado, chopped into small cubes
1/4 cup chopped red onion
1/3 cup Kewpie mayonnaise
1 teaspoon lime juice
1 teaspoon sriracha
1 garlic clove, finely minced
1 teaspoon of shio-koji (or sub in a pinch of salt)
fresh ground pepper, to taste
Instructions
1. Slice cooked shrimp into small bite-sized pieces. Place in a medium-sized bowl. Combine with cherry tomatoes, avocado and red onion.
2. In a small bowl, whisk together Kewpie, lime juice, sriracha, garlic, shio-koji and pepper.
3. Pour dressing over shrimp mixture. Gently toss together.
4. Give the flavors a chance to meld together (I throw it in the fridge for a half hour).
5. Keep refrigerated until ready to serve.
Makes 2 servings
* If you're in Sacramento, Oto's sells Kewpie.
Sunday, August 18, 2013
Pan-Seared Scallops & Morels in Beurre Blanc
It's that wonderful time of the year...the day most parents count down to (like a kid counts down to Christmas) - THE FIRST DAY OF SCHOOL. Although Mr.S.'s kidlets are great, by the end of summer both our nerves are pretty frayed. This year the kidlets will be attending different schools so they each had a different start date. Kidlet #1's first day of high school was last Monday and Kidlet #2 starts back up this Tuesday at his elementary school. The consensus after the first week from Kidlet #1 was that high school was "pretty cool," especially since he's already made new friends and due to a scheduling glitch he ended up with TWO lunch periods on the first day.
Anyhow, Mr.S. and I thought we'd celebrate this "holiday" by cooking up a tasty treat for ourselves. A celebration of surviving a summer of teen and preteen hormones, sibling rivalry and incessant "I'm bored's" and "He's looking at me's". I picked up some fresh, plump (or as I like to call them- fat ass) scallops at my favorite seafood store, Sunh Fish, along with some morels at the Co-op. I figured these ingredients paired with a simple beurre blanc (a velvety white butter sauce) would make a mind-blowing meal. And guess what? I was right! [I also made a side of sautéed balsamic carrots and beets greens so that we got our veggies in. ☺] The recipe didn't take too long to make, especially since I did my Back-to-School happy dance while whistling to The Final Countdown as I prepared the meal.
By the way, just a heads up-- beurre blanc is not for the faint of heart, it involves a INSANE amount of butter. Don't say I didn't warn you....
Pan-Seared Scallops and Morels in Beurre Blanc
Ingredients
1 dozen fresh, large scallops (season on both sides with salt and pepper)
6 morels, cleaned of all grit and sliced in half length-wise
1/4 cup dry white wine
1/4 cup champagne vinegar (or white wine vinegar)
1 tablespoon heavy cream
2 tablespoon finely minced shallots
Kosher salt and ground white pepper, to taste
2 sticks cold, unsalted butter (cut into tablespoon-size pieces)
1 tablespoon of clarified butter
1 tablespoon of vegetable oil
6 cherry tomatoes, cut in half
4-5 finger limes (optional)
Instructions
1. In a medium saucepan, bring the wine, champagne vinegar and shallots to a boil.
2. Cook for about 10-12 minutes, until the mixture is reduced to a thick sauce-like consistency.
3. Reduce heat to low and add in the cream. Stir.
4. Add 1 tablespoon of COLD butter at a time. Whisk each piece in thoroughly, making sure it incorporates into the sauce. Keep whisking constantly throughout the whole butter adding process. The sauce should be rich and creamy looking when you're done.
5. Season with salt and pepper.
6. On a large plate, arrange your tomato halves.
7. In a large cast-iron pan, heat up the clarified butter and vegetable oil over high heat. (You want it smokin' hot.)
8. Place the scallops in the pan. Don't crowd them. Then don't touch them for about 2 minutes. Let them cook undisturbed, you want to get that nice golden-brown crust. At two minutes, flip them over and cook them for another minute or two depending on the thickness of the scallops. (Be sure that you don't overcook them, overcooked scallops taste rubbery and gross.)
9. Remove scallops from heat and place on plate.
10. In the same pan, you just removed the scallops, give your morels a quick sauté. Add another pat of butter if you wish.
11. Place the sautéed morels on the plate. Scoop the beurre blanc over the scallops, morels and tomatoes. Garnish the scallops with finger lime caviar if you wish. Enjoy!
* Note: Beurre blanc does not keep well, so you want to make it right before you use it.
Thursday, August 15, 2013
Ingredient Spotlight: Finger Limes (and Grilled Oyster Recipe)
I've been enamored with finger limes ever since I had them on some fresh oysters and in some phenomenal cocktails last year. I love how the little tiny spherical bubbles feel on my tongue and when you bite into them you get this effervescent burst of lemon-lime flavor with a slight floral undertone. They're kind of like a citrus pop rock.
Now I'll admit at first glance, finger limes are a bit fugly. They look like dried out gherkins (especially the ones with brown or purple peel) or a pudgy ogre finger, but the pulp inside this microcitrus is amazing. When you cut into the finger lime (which by the way isn't even a lime, it's a cousin to the lime), you'll see a bunch of translucent pearls. They can range in color from clear, green or pink. If you give the outside layer a squeeze, the pearl-like pulp will come tumbling out.
Finger limes are quite versatile. You can use them in drinks, marmalades, salads....You can also use the zest. The zest of finger limes is a bit unusual. It's thin and contains isomenthone, which is common in mint but unusual in citrus. My favorite way to use finger limes is to squeeze them onto fresh oysters (raw or grilled). Used as a garnish, the finger lime pearls add a nice kick of tanginess. One of the many cool things about finger limes is that you can freeze them (for 3-6 months). If you do this, you want to place them whole (uncut) on a baking sheet and once frozen, transfer them to an airtight container. When defrosting, defrost in the fridge.
Finger limes are a native bush to Australia so they're a bit hard to find but some farms (like Shanley Farms) in California have started growing them recently in small quantities. I was able to buy a container of them from the kind folks at Produce Express, which caterers to restaurants. So if you're in the restaurant biz you can order directly from them. Otherwise, I've seen finger limes at Whole Foods on occasion. Or you can grow your own! Four Winds Growers in Winters, CA sells them in 5 gallon size tree form to area retailers.
Grilled Oysters With Butter, Sriracha and Finger Lime "Caviar"
Ingredients
1 dozen fresh oysters (I prefer the large ones for grilling), scrubbed
1/2 stick of unsalted butter, softened
1 teaspoon of Sriracha
1/4 teaspoon sea salt
2 tablespoons of grated Parmesan or Pecorino-Romano (optional)
5-6 finger limes, cut in half
Instructions
1. Heat up your grill so it's VERY hot.
2. In a small bowl, mix up your butter, sriracha and sea salt. Place the bowl in the fridge for a bit to let it firm up.
3. Use an oyster shucker to open up your oysters. Be careful when popping the hinge, the shells are brittle and oftentimes sharp. Please don't slice open your hand.
* If you do not own a shucker or just don't want to shuck, you can place the closed oysters on your hot grill (cupped side on the bottom), with the top closed for 1-2 minutes. The oysters will open up on their own from the heat. Remove them as soon as the open.
4. Place a dollop of the butter-Sriracha mixture on each of your oyster. You can lightly sprinkle some Parmesan on the top too, if you wish. Place the oysters on the grill for 4-5 minutes (3-4 minutes if you popped them on the grill to open them). Use tongs to remove oysters from grate. The shell will be extremely hot.
5. Top with a squeeze of finger lime "caviar." Serve immediately.
Monday, April 8, 2013
Pan-fried Halibut Cheeks with Asparagus-Mushroom Israeli Couscous
Last week was a great week for two reasons- I made Mr.S. and I the most wonderful dinner on Thursday night (yep, I'm tootin' my own horn) and then on Friday night we saw a fantastic play at the Sacramento Theatre Company. I'm going to take a moment to gush here a bit...if you haven't seen STC's production of Athol Fugard's "Master Harold...and the boys," get your butt off the sofa and go buy your tickets now! This is the second time I've seen this play (I saw it the first time when I was in college) and I have to say this version was amazing. Michael J. Asberry's performance as Sam was so moving that at times I forgot we were watching a play and felt transported to the St. George's Park Tea Room in South Africa. The play takes place in 1950 (during the apartheid era) and tells the story of a 17-year old white boy (Hally) and two black waiters (Sam and Willie) during a rainy afternoon. This timely story of Fugard's does a phenomenal job of discussing oppression and compassion on a large scale (universally) and also on a smaller scale (in our own lives). The content is quite poignant and thought-provoking and the ending will haunt your mind for days afterward (especially when you find out that the play is based on a personal account of Fugard's).
There's a great review in the Bee, if you're interested in finding out more : Master Harold...and the boys. (Btw, this production is not suitable for young children.)
Ok, now back to our regular programming...the awesome dinner I made Thursday night was: pan-fried halibut cheeks accompanied by Israeli couscous mixed with fresh asparagus and mushrooms. Mmm! Simple but super delicious. If you've never had halibut cheeks before, you should definitely try it. It's the sweetest most tender part of the halibut. The cheeks kind of remind me of scallops but flakier.
Now I had never cooked halibut cheeks at home before so I asked one of the friendly fishmongers at Sunh Fish for some direction, his call- just gently pan-fry them. I'm so glad I followed his suggestion because this is seafood that definitely does not need any futzing. I also made some Israeli couscous to go with it but these cheeks would have been just as good on a bed of sautéed greens.
(If you're unfamiliar with Israeli couscous, it's a wheat-based pasta that's rolled into tiny balls that resemble Nerf pellets. It has a nice nutty taste when toasted.)
Pan-Fried Halibut Cheeks
Ingredients
1 lb. fresh halibut cheeks
2 tablespoons AP flour
salt and pepper
2 tablespoons butter
fresh parsley, chopped (optional)
Instructions
1. Gently pat your halibut cheeks dry with a paper towel. Season with salt and pepper on both sides.
2. Spread the 2 tablespoons of flour on a plate then very, very LIGHTLY dredge the cheeks through the flour. Set aside.
3. Place the skillet over medium-high heat. Melt 1 tablespoon of butter. Place your halibut cheeks on the skillet. Space them out a bit so that they do not touch each other. Let them cook for 2 minutes. Then using a spatula flip them over. Allow to cook for another minute to a minute and a half. (Be careful not to overcook the cheeks.)
4. Repeat with remaining butter and fish.
3. Plate. Garnish with chopped fresh parsley (optional).
Israeli Couscous with Fresh Asparagus and Mushrooms
Ingredients
1 1/3 cup Israeli couscous
2 tablespoons olive oil
1 bunch of asparagus (woody stems removed, sliced into 1-inch pieces)
1 8-oz. package of crimini mushrooms, sliced
1 small sweet onion, diced
3-4 fresh garlic cloves, minced
2-3 tablespoons Parmesan cheese, grated
salt and freshly ground pepper, to taste
Instructions
1. In a medium sized pan , heat 1 tablespoon of olive oil. Add couscous. Over medium heat, toast the couscous until it's lightly browned.
2. Add 1 3/4 cup of boiling water to the saucepan and couscous. Stir well to combine. Bring the whole lot to a boil. Then reduce the heat to medium-low, cover and let it simmer for 15 minutes (or until all the liquid is absorbed). Remove from heat and set aside.
3. In a separate pan, heat remaining tablespoon of olive oil over medium heat. When it begins to shimmer, add garlic and onions. Cook until onions begin to slightly soften, then add asparagus and mushrooms. Cook 6-8 minutes (depending on how crisp you like your asparagus). Stir occasionally.
4. Remove from heat. Add veggie mixture to cooked couscous. Add grated Parmesan cheese and season to taste with salt and pepper. Toss. Serve.
There's a great review in the Bee, if you're interested in finding out more : Master Harold...and the boys. (Btw, this production is not suitable for young children.)
Photo Source: Sacramento Theatre Company
Ok, now back to our regular programming...the awesome dinner I made Thursday night was: pan-fried halibut cheeks accompanied by Israeli couscous mixed with fresh asparagus and mushrooms. Mmm! Simple but super delicious. If you've never had halibut cheeks before, you should definitely try it. It's the sweetest most tender part of the halibut. The cheeks kind of remind me of scallops but flakier.
Now I had never cooked halibut cheeks at home before so I asked one of the friendly fishmongers at Sunh Fish for some direction, his call- just gently pan-fry them. I'm so glad I followed his suggestion because this is seafood that definitely does not need any futzing. I also made some Israeli couscous to go with it but these cheeks would have been just as good on a bed of sautéed greens.
(If you're unfamiliar with Israeli couscous, it's a wheat-based pasta that's rolled into tiny balls that resemble Nerf pellets. It has a nice nutty taste when toasted.)
Pan-Fried Halibut Cheeks
Ingredients
1 lb. fresh halibut cheeks
2 tablespoons AP flour
salt and pepper
2 tablespoons butter
fresh parsley, chopped (optional)
Instructions
1. Gently pat your halibut cheeks dry with a paper towel. Season with salt and pepper on both sides.
2. Spread the 2 tablespoons of flour on a plate then very, very LIGHTLY dredge the cheeks through the flour. Set aside.
3. Place the skillet over medium-high heat. Melt 1 tablespoon of butter. Place your halibut cheeks on the skillet. Space them out a bit so that they do not touch each other. Let them cook for 2 minutes. Then using a spatula flip them over. Allow to cook for another minute to a minute and a half. (Be careful not to overcook the cheeks.)
4. Repeat with remaining butter and fish.
3. Plate. Garnish with chopped fresh parsley (optional).
Israeli Couscous with Fresh Asparagus and Mushrooms
Ingredients
1 1/3 cup Israeli couscous
2 tablespoons olive oil
1 bunch of asparagus (woody stems removed, sliced into 1-inch pieces)
1 8-oz. package of crimini mushrooms, sliced
1 small sweet onion, diced
3-4 fresh garlic cloves, minced
2-3 tablespoons Parmesan cheese, grated
salt and freshly ground pepper, to taste
Instructions
1. In a medium sized pan , heat 1 tablespoon of olive oil. Add couscous. Over medium heat, toast the couscous until it's lightly browned.
2. Add 1 3/4 cup of boiling water to the saucepan and couscous. Stir well to combine. Bring the whole lot to a boil. Then reduce the heat to medium-low, cover and let it simmer for 15 minutes (or until all the liquid is absorbed). Remove from heat and set aside.
3. In a separate pan, heat remaining tablespoon of olive oil over medium heat. When it begins to shimmer, add garlic and onions. Cook until onions begin to slightly soften, then add asparagus and mushrooms. Cook 6-8 minutes (depending on how crisp you like your asparagus). Stir occasionally.
4. Remove from heat. Add veggie mixture to cooked couscous. Add grated Parmesan cheese and season to taste with salt and pepper. Toss. Serve.
Labels:
entree,
event,
fish,
sacramento,
seafood,
side dish,
vegetables
Thursday, February 28, 2013
Jambalaya That'll Warm You Up
"New Orleans food is as delicious as the less criminal forms of sin."
-Mark Twain
Why hello there readers! Sorry for the lack of posts but I took a brief hiatus from cooking while in Kansas City. Unlike my December trip to KCMO, this month's trip was COOOOOOLD, however, I was lucky to get out before the snowfall got real (and deep!).
This is what the snow looked like while I was there:
This is what it looked like just a couple days after I left. The snow is up to two feet!
Anyhow, now I'm back in the milder climate of good ol' Sacramento but I've still been craving some pipin' hot meals to warm up my poor cold body...so this week, I decided to make a hearty batch of jambalaya. This down-home recipe is on the milder side of the spiciness scale but if you like heat, add a tad more cayenne and hot sauce (whoo-boy!) and you'll be set. I had to keep our batch toned down since the kidlets were eating with us. Also if you want to keep true to the holy trinity of Cajun cooking (onion, celery and green bell pepper) you can sub in a green bell pepper for the red. No one at our dinner table likes green bell peppers which is why I threw in a red one. ;)
This recipe makes enough jambalaya to feed a family of four and have enough the next day for a round of leftovers. It reheats well. Don't you love when you can get two meals out of one night's cooking? I know I do!
Now pour yourself a stiff drink, get cooking and... Laissez les bons temps rouler!
Jambalaya
Ingredients
1 lb. Andouille sausage, sliced 1/4 inch thick
1 tablespoon Canola oil
1 tablespoon unsalted butter
1 yellow onion, diced
5-6 cloves of fresh garlic, diced
1 large red bell pepper
3 stalks of celery, diced (use the tender stalks in the heart of the celery) & dice up those celery leaves as well
1 (10 oz) can Rotel diced tomatoes with green chilies- drained
1 (14.5 oz) can diced tomatoes- drained
3 bay leaves
4 sprigs of fresh thyme
1 tablespoon Worcestershire sauce
2 tablespoons concentrated tomato paste
1 teaspoon hot sauce (I like Frank's or Crystal)
4 cups chicken stock
2 cups long grain white rice- uncooked, rinsed
1 lb. fresh large shrimp- rinsed, peeled and deveined
6 scallions, sliced thin
1 tablespoon smoked paprika
1 tablespoon garlic powder
1/2 teaspoon onion powder
1/4 teaspoon cayenne
1/2 teaspoon dried oregano
1 teaspoon Cajun seasoning (optional)
salt and pepper, to taste
juice of 1/2 a lemon
flat-leaf parsley, chopped- for garnish (optional)
Instructions
1. In a heavy bottomed pot, heat canola oil on medium-high heat. Add sliced sausage, cook until browned. Remove sausage, place in a bowl and set aside.
2. Leave the sausage drippings in the pot, heat 1 tablespoon of butter. Add in diced onions. Cook for about 5 minutes. Add garlic, sauté a few minutes more until onions soften and become translucent.
3. Add celery, celery leaves and red bell pepper. Allow to cook for about 3 minutes, stirring occasionally.
4. Add both cans of tomatoes, bay leaves and sprigs of thyme. Allow to simmer for 4-5 minutes.
5. Add Worcestershire sauce, tomato paste, hot sauce and sausage. Stir and allow to cook 5 minutes.
6. Add chicken stock. Bring ingredients to a rapid boil. Add smoked paprika, garlic powder, onion powder, cayenne, oregano and Louisiana Cajun seasoning. Stir thoroughly.
7. Add 2 cups of rinsed rice. Bring to a boil.
8. Lower heat to a simmer, cover tightly and allow to cook for about 20 minutes until liquid is absorbed.
9. Turn off heat. Add in uncooked shrimp and sliced scallions. Give it a good stir or two.
10. Replace lid. Let it sit, untouched, for 15 minutes. (The shrimp will cook up from the heat in the pot.)
11. Open. Removed bay leaves and thyme sprigs. Season to taste with salt and pepper.
12. Squeeze lemon over jambalaya. Stir. Sprinkle with chopped parsley (optional). Serve.
Thursday, February 14, 2013
Seared Scallops with Tangy Carrot Puree
This year unfortunately I'm 1800 miles away (literally) from Mr.S. for Valentine's Day. I have to admit I'm a wee bit bummed but to be honest everyday is Valentine's Day when you're with someone you're head over heels in love with so in the long run it's no big deal. I love that we do romantic things year round instead of only on a day that Hallmark dictates that we should. One of my favorite things to do with Mr.S. is cook dinner for him. Don't get me wrong, I love cooking with him too but sometimes it's nice to spoil your partner with a fabulous meal. In fact, Julia Child once said, "I think careful cooking is love, don't you? The loveliest thing you can cook for someone who's close to you is about as nice a Valentine as you can give,"...that Julia, she's a wise one-- and I think she was spot on.
Anyhow, before I left for my trip I made Mr.S. this recipe for scallops with carrot puree. The puree didn't come out quite as smooth as I would have liked (I was at Mr. S's so I was using a blender to puree the carrots and it kept crapping out every 10 seconds) but it didn't matter because he looked so happy when I placed the plate of caramelized scallops before him. It sounds crazy but--- I'll take a romantic dinner on an average old Wednesday night any day over a box of chocolates or an expensive meal on February 14th.
So readers, please excuse the awful photo (I was more concerned about starting the meal then getting the perfect pic) and take the time to look over the recipe below. Then pick a night, any ol' normal night and surprise whomever you love by cooking this recipe. Light some candles, open a bottle of good wine and celebrate each other. You'll be glad you did.
Seared Scallops with Tangy Carrot Puree
Ingredients
1 lb. dry, large sea scallops
3 tablespoons clarified butter
sea salt and freshly ground pepper
1 large shallot, chopped
2 cloves garlic, minced
3 large carrots- peeled & cut into 1/2-inch rounds
1/2 teaspoon Maldon salt (you can sub in sea salt)
1/8 teaspoon cayenne
1/4 cup room temperature water
1/2 cup fresh Meyer lemon juice
3-4 Tablespoons Greek yogurt
1 tablespoon unsalted butter
Instructions for Puree
1. Place a large steel or cast-iron skillet, over medium heat. Drizzle 1 tablespoon of olive oil across the pan. Once the oil starts to shimmer, throw in the chopped shallots. Cook your shallots for about 3-4 minutes, until they get soft.
2. Add garlic, cook until fragrant. Add carrots, salt, cayenne and water.
3. Raise heat to high and bring it all to a boil. Then reduce heat to a simmer, cover and cook for 10-12 minutes.
4. Once the carrots are tender, take the skillet off the heat and allow ingredients to cool for 5 minutes.
5. Move your mixture to a blender. Add your Meyer lemon juice and blend. Then add your Greek yogurt and butter and blend. Puree until smooth but thick.
Handy Tip: When using a blender to process hot foods/liquids- slightly release one corner of the blender's lid. This will prevent the vacuum effect that results in heat explosions. To safeguard against splatter, place a towel over the top of the machine, give it a few pulses after which you can process on high speed until smooth.
6. Season to taste with salt. Set aside and keep warm.
Instructions for Scallops
1. Place scallops on a large plate. Sprinkle them with salt and pepper on both sides.
2. Place a large cast iron skillet over high heat. Place a tablespoon and a half of butter on the skillet.
3. Place half of the scallops on the skillet, you want them spread apart so they have room to sear. Now here's the most important thing- don't touch them for 2 minutes. Don't nudge, peek or poke...you want to get that nice think layer of crunchy caramelization on them. At the end of 2 minutes, gently flip each scallop over and cook for another 1.5-2 minutes. Remove and place on a warmed plate.
4. Repeat with remaining butter and scallops.
5. Spoon carrot puree onto plate. Arrange the scallops on top of the puree. Pair with mixed greens salad or your favorite roasted veggies.
Tuesday, January 15, 2013
Weeknight Creamy Clam Chowder
My god, has it been colder than a witch's tit or what lately? I know it's been colder than past Sacramento winters because I've actually been wearing SOCKS the past two weeks and I rarely wear socks (I absolutely abhor the feeling of my feet being encased). However, it's been a choice of wearing socks and being uncomfortable and grouchy or having numb toes and blue feet...so there you have it, socks win. Dammit! Anyhow, to keep warm I've also been eating a LOT of soup. Soup, it's the ultimate comfort food and there's so many different kinds-- smooth butternut squash, heart warming chicken noodle, zingy tom yum...the list is endless. What's your favorite kind to dig into on chilly nights? For me, it's homemade mushroom soup- the thick velvety kind that dances on your tongue with a luxurious, earthy flavor. I could eat it everyday! For Kidlet #1, it's clam chowder in a bread bowl. He goes absolutely bonkers for the briny-creamy concoction. He'll even eat the watery canned stuff in a pinch (gack!)...so I thought I'd surprise him with a batch for dinner last night. Now I know there's all kinds of low-cal, low-fat, skinny-minny recipes out there for clam chowder. I've tried a few...and quite honestly, they suck. I say- if you're gonna make some chowder, go balls out and use butter, cream and potatoes. You can even use fresh clams but if you're like me, you're a bit lazy on weeknights and canned will suffice. Anyhow, give yourself a reprieve from the almond milk and tofu and be decadent for one evening. Vive la chowder!
(Chowda purists be warned though- this is not the traditional chowder most likely immortalized in the memories of your youth spent summering in New England; however, it is a hearty, aromatic, delicious taste of the sea nonetheless, so give it a try. )
Creamy Clam Chowder
Ingredients
1/2 lb. sliced bacon
1 large sweet onion, diced
2 stalks celery, chopped
1 lb. of Honey Gold potatoes, quartered or 3 Yukon Gold potatoes, cubed
1 cup carrots, peeled and chopped
1 leek, chopped (white and light green parts only)
2 cobs fresh corn, zippered
3 cloves fresh garlic, minced
3 cans (10 oz. undrained) whole baby clams
6 tablespoons unsalted butter
3 tablespoons rice flour (you can use AP flour if you must)
1 cup whole milk
1 cups cream
3 teaspoons Kosher salt
1/2 teaspoon fresh ground pepper
1 bay leaf
1/2 teaspoon thyme
4 sourdough bowls (optional)
Instructions
1. In a pan, cook your bacon. Let it crisp up (about 3-4 minutes). Remove bacon with a slotted spoon or tongs and set on a paper-towel, leave the bacon grease in the pan.
2. In the pan (with the bacon grease), add in the onion and leek. Saute for about 7-8 minutes over medium heat, until onions are soft and semi-translucent. Stir frequently. Add in garlic. Cook for about another 1-2 minutes. Transfer ingredients to a large soup pot, set aside.
3. In pan, melt 3 tablespoons of butter. Add your jumble of celery, potatoes, carrots and corn. Cook for about 10 minutes on medium-high heat. Transfer ingredients to soup pot.
4. Open all three cans of clams. Drain liquid into a measuring cup and save. Place clams in a bowl and place in fridge.
5. Place soup pot on burner over medium-high heat. Add 2 cups of clam juice. Stir. Allow to cook for 15-20 minutes.
6. Add in clams, salt, pepper, thyme and bay leaf. Slowly add in milk and cream. Stir until sauce comes to a boil, reduce heat to a simmer. Cover and allow to cook another 15 minutes. Chowder will thicken.
[7. If you like your chowder on the slightly thicker side: In a pan or small pot, whisk together 3 tablespoons of rice flour with 3 tablespoons butter. Once it's bubbling, add a large ladle of chowder to the flour and butter mixture (aka roux). Mix together well then add it back into the pot of chowder. Turn the heat up and allow it to come to a boil, then again reduce to a simmer.]
8. Hollow out your sourdough bowls. (I like to keep the dough I pull out, it's great for dipping into the soup.) Chop your bacon slices into 1/4-inch pieces.
9. Stir soup occasionally. Adjust seasonings if needed. Make sure potatoes are knife-tender. Discard bay leaf.
10. Ladle into sourdough bowls. Sprinkle with bacon bits. Garnish with cracked pepper or chopped fresh parsley (optional). Serve hot.
Sunday, December 9, 2012
Crab-Stuffed Baked Avocado
Eric Ripert. That silver-haired French fox is turning up everywhere these days. He's popped up on "Top Chef," "Treme" and "No Reservations." Not to mention, he's good buddies with Bourdain, hosts his own PBS TV series “Avec Eric," and his restaurant Le Bernardin has garnered three Michelin stars and has upheld a four-star review from The New York Times for over two decades. Holy cow! Is there anything this culinary wizard can't do? Well in addition to making amazing seafood dishes, it turns out he knows his way around an avocado too. I recently came across this tweet of his and decided to give it a go.
There were no measurements listed so I played around with the ingredients in my kitchen. The resulting product- a decadent dish of fresh crab and warm, creamy avocado that only takes a few minutes and a few dollars to throw together. Deee-lish!
Crab-Stuffed Avocado
Ingredients
6 oz. shredded fresh lump crabmeat
1 fresh avocado, halved and pitted
2 tablespoons Best Foods's mayo
1 teaspoon Dijon mustard
3/4 teaspoon Old Bay seasoning
1 teaspoon fresh lemon juice
fresh ground pepper
2.5 Tablespoons breadcrumbs
lime or lemon wedges (optional)
Instructions
1. Set oven for broil. Slice and pit avocado.
2. Line a baking sheet with foil and place pitted avocado halves on sheet.
3. In a small bowl, combine crabmeat, mayo, mustard, Old Bay seasoning and lemon juice together. Mix well.
4. Divide the crabmeat mixture evenly into two servings. Using a spoon, fill each avocado cavity with a serving of the mixture. Top with some fresh ground pepper (to taste).
5. Sprinkle generously with breadcrumbs.
6. Place in oven and broil for about 10 minutes (keep an eye on it if your oven's temperamental like mine).
7. Remove from oven and serve immediately. Lime or lemon wedges (optional).
Thursday, November 8, 2012
Oven-Baked Fresh Salmon
This past weekend, Mr.S. took me and the kidlets on an impromptu field trip to the Nimbus Fish Hatchery so we could see all the salmon jumping about. It was quite incredible...salmon, salmon everywhere, as far as the eye could see! We were all pretty much in awe. I even took a few photos while we were there:
If you get a chance stop by there. Kidlets will love feeding the fish in the "nursery" tanks and watching the fish jump up the fish ladder.
So to celebrate all the salmon in the American River, Mr. S. and I decided to cook up some salmon for dinner Wednesday night. Can you say yum?! (Salmon is also rich in Omega-3 fatty acids which is good for your cardiovascular health.) I stopped by and picked up a nice big piece of fresh salmon at Sunh Fish and cooked it up in a no-frills manner: olive oil, a few pinches of herbes de Provence, lemon slices and a boatload of garlic (we love garlic!). We then tented it up in foil and chucked it in the oven. In less than a half hour, we had some wonderfully moist and flavorful salmon dressing up our plates. Keeping with the healthy theme, we also made some roasted delicata squash and a mushroom and asparagus quinoa pilaf...but more on that later this week. ;)
Oven-Baked Fresh Salmon
Ingredients
1.5 lbs fresh (wild) salmon - you can cut these into smaller individual fillets or roast it as one giant fillet
Extra virgin olive oil
Herbes de Provence
Kosher salt
Fresh ground pepper
4-6 garlic cloves, minced
3 small lemons (2 sliced, 1 in wedges)
Aluminum foil
Instructions
1. Preheat oven to 400 degrees F.
2. Place a large piece of aluminum foil on a baking sheet. Drizzle a little olive oil on it and spread it out.
3. Place salmon on the middle of the foil sheet, skin side down. Lightly coat the fish with olive oil. Season with a few pinches of herbes de Provence, several minced cloves of garlic, some Kosher salt and fresh ground pepper. Squeeze some fresh lemon across the top.
4. Place slices of lemon across the top.
5. Fold the sides of the foil upward and over, creating a small tent-like packet. Make sure everything is covered and all the sides are sealed tightly.
6. Bake for 20-25 minutes (or more if you have really thick fillets), until salmon is fully cooked.
Tip: cook the fish 10 minutes for each inch of thickness.
7. Use a spatula to transfer fillets to plates. Serve with lemon wedges.
If you get a chance stop by there. Kidlets will love feeding the fish in the "nursery" tanks and watching the fish jump up the fish ladder.
So to celebrate all the salmon in the American River, Mr. S. and I decided to cook up some salmon for dinner Wednesday night. Can you say yum?! (Salmon is also rich in Omega-3 fatty acids which is good for your cardiovascular health.) I stopped by and picked up a nice big piece of fresh salmon at Sunh Fish and cooked it up in a no-frills manner: olive oil, a few pinches of herbes de Provence, lemon slices and a boatload of garlic (we love garlic!). We then tented it up in foil and chucked it in the oven. In less than a half hour, we had some wonderfully moist and flavorful salmon dressing up our plates. Keeping with the healthy theme, we also made some roasted delicata squash and a mushroom and asparagus quinoa pilaf...but more on that later this week. ;)
Oven-Baked Fresh Salmon
Ingredients
1.5 lbs fresh (wild) salmon - you can cut these into smaller individual fillets or roast it as one giant fillet
Extra virgin olive oil
Herbes de Provence
Kosher salt
Fresh ground pepper
4-6 garlic cloves, minced
3 small lemons (2 sliced, 1 in wedges)
Aluminum foil
Instructions
1. Preheat oven to 400 degrees F.
2. Place a large piece of aluminum foil on a baking sheet. Drizzle a little olive oil on it and spread it out.
3. Place salmon on the middle of the foil sheet, skin side down. Lightly coat the fish with olive oil. Season with a few pinches of herbes de Provence, several minced cloves of garlic, some Kosher salt and fresh ground pepper. Squeeze some fresh lemon across the top.
4. Place slices of lemon across the top.
5. Fold the sides of the foil upward and over, creating a small tent-like packet. Make sure everything is covered and all the sides are sealed tightly.
6. Bake for 20-25 minutes (or more if you have really thick fillets), until salmon is fully cooked.
Tip: cook the fish 10 minutes for each inch of thickness.
7. Use a spatula to transfer fillets to plates. Serve with lemon wedges.
Wednesday, October 10, 2012
Pesce al Sale - Whole Fish Encased in Salt Crust
I remember once Mr.S. commenting that he loved that my friends were such amazing cooks...and you know what? So do I! I'm a lucky girl indeed. Last night, I had the pleasure of dining at my friend Lacy's new house. When I got there, I found out she had picked up some whole branzinos at Sunh Fish and was going to cook them in a salt crust. I was totally excited since I'd been dying to try this method for quite awhile. The technique turned out to be quite simple. The salt crust essentially steamed the fish and the fish came out amazingly moist (and not overly salty at all). I think I may have to do this one for Mr.S. soon!
Pesce al Sale
Ingredients
1 (3 lb. box) coarse Kosher salt
5-6 large egg whites
3 (1 lb.) fresh whole branzinos, scaled & gutted (leave the head and tail intact)
3 fresh lemons, 2 thinly sliced and 1 cut in wedges
3 sprigs fresh thyme
3 sprigs fresh rosemary
3 cloves garlic, minced (optional)
extra-virgin olive oil
2 tablespoons chopped parsley
Instructions
1. Preheat oven to 400 degrees
2. In a large mixing bowl, incorporate salt and egg whites together. What you want to end up with is a sand-like consistency.
3. Rub the exterior of the fish down with olive oil.
4. Stuff the cavity of the fish with lemon slices, herbs and garlic (optional).
6. Place the fish on top of the salt bed. Then cover it with the remaining salt mixture, making a salt shell. You want all of the fish covered. Firmly press the salt mixture into the flesh.
7. Roast for 20-25 minutes. (Until thermometer reads 135 degrees.) The crust will turn golden brown and hard.
8. Remove baking sheet with fish from oven. Let it cool for about 10 minutes.
9. Tap the salt crust with the back of a heavy spoon. The mound should crack and come apart. Lift the larger pieces of salt crust off and brush away smaller pieces. Gently using a knife or small spatula, peel off the skin of the fish. Lift the exposed fillet off the fish and transfer it to a serving plate. Then lift the tail and pull upward, lifting off the bones from the bottom fillet. Extract the bottom fillet from the skin and place on plate.
Sunday, August 19, 2012
Sunh Fish...& Whole Grilled Branzino with Lemon and Thyme
1900 V Street, Sacramento, CA 95818. (916) 442-8237.
M-F 8-5pm, Sat & Sun 9am-3pm. Accepts plastic.
When my friend, Cate, decided to throw a sushi party two years ago for her birthday I accompanied her to Sunh Fish on Broadway to pick up a few seafood items. I had heard about Sunh Fish before but had never stopped in there. The seafood we got there was great and I kept meaning to get back over there again, but life got busy and I never did. Flash forward to this year, I read about Sunh Fish moving to 19th and V Street into the old Verge Gallery. It was now within walking distance from my cottage! But did I ever get there? Nope...not until this week and I could kick myself that I haven't visited sooner.
Earlier this week, a chef acquaintance of mine had posted a tantalizing photo of some plump Tiger shrimp and creamy looking stone ground grits on his Facebook and noted that the shrimp were from Sunh Fish. Mr. S. and I had just been lamenting recently that there was such a limited selection of places to buy good seafood at in Sac; so when I saw that post, I decided to shoot the chef an email and ask if Sunh Fish sold whole fish retail and whether the fishmongers there would gut and scale the fish for you. I got an enthusiastic, "Yes!" back. So on my way home from running errands Thursday afternoon, I popped in there. Sunh Fish has a nice (free) parking lot, so you can swoop in and out easily. As I entered the building, I immediately noticed that the "store" area was one big room- warehouse big! There was an office to the left and then a large display case housing sushi-grade sashimi and salmon. Also in the case were fresh diver scallops, mussels, about four different kinds of prawns and an assortment of other delectable seafood. Walking up, I was immediately greeted with a friendly smile and an offer of assistance. I knew I wanted a whole fish to grill but I wasn't really sure what kind, so I asked the gentleman behind the counter for some recommendations. He suggested the Branzino (aka loup de mer, a European sea bass that has firm meat, not too many bones and is sustainable). I bought two, which came out to roughly two pounds. While I was waiting for him to scale and gut my purchase, I chatted with an elderly Japanese lady (a fellow customer) who had nothing but rave reviews for the store and suggested next time I try out a few of the oysters. I also wandered over, perused the cold case on the adjacent wall and noted that they carried several different kinds of tobiko and other sushi odds and ends. As I was checking out, the gentleman that had been assisting me was kind enough to answer my numerous questions about grilling fish whole and offered a few helpful cooking tips.
So if you're thinking of cooking up some seafood, I would highly recommend paying Sunh Fish a visit- excellent, quality seafood and phenomenal service. Plus they're open 7 days a week.
RECIPE
Here's some quick instructions and tips on how to cook whole Branzino. The prep, cooking and clean up turned out to be quite simple. Although we had a bit of an issue with the fish sticking a bit to the grill, it tasted fantastic - light, flaky and fresh. We'll definitely be opting to cook fish whole more often...maybe next time we'll try the salt crust method.
Grilled Branzino
Ingredients
2 one pound whole Branzinos, gutted and scaled
extra virgin olive oil
2 lemons, thinly sliced
1 bunch of fresh thyme
3 garlic cloves, minced
sea salt and fresh ground pepper
kitchen twine
Instructions
1. Preheat your grill (medium-high heat) or if using charcoal, start your fire. Word to the wise- make sure your grate is extremely clean and be sure to rub it down with LOTS of oil (or use an oiled fish basket). We thought we had used enough oil on the grill but the fish skin still stuck. Boo! Next time we'll have to use more.
2. Rinse the fish under cold water (inside and out- be careful of the dorsal fin, it's spiny and sharp) and pat dry. Cut vertical slits into the side of the fish, about 1 inch apart. Turn fish over and repeat.
3. Rub the fish inside and out with olive oil.
4.Season the inside of the Branzino with salt and pepper. Then gently massage the outside of the fish with salt.
5. Place lemon slices and thyme sprigs in the cavity of the fish.
6. Cut two pieces of kitchen twine for each fish. Tie them around the thickest part of the fish to secure the inside ingredients from falling out.
7. Place the fish horizontally on the grill over direct medium-high heat.
8. Rule of thumb: grill the fish about 8-10 minutes/a side per 1-inch of thickness.
9. Place a spatula under the fish (or use two spatulas- one on top, one underneath) and flip the fish over.
On the grill...skin stuck a little
10. To check for doneness: insert a metal skewer or a small knife into the thickest part of the fish's flesh, if it's done it should have some give and slide in easily. The skin should look crispy and the flesh will be moist and flaky.
11. Remove from grill, allow to rest for 4-5 minutes. Serve warm with lemon.
The Aftermath
Thursday, May 31, 2012
Blackbird Kitchen
1015 9th Street, Sacramento, CA 95814. (916) 498-9224.
http://blackbird-kitchen.com/
Yesterday I met up with some friends at Blackbird Kitchen for a casual Happy Hour. Being a fan of Chef Kevin O'Connor's cooking after dining at one of his amazing Treehouse dinners last year, I was really looking forward to seeing what his newest project with owner, Carina Lampkin had to offer. I loved the food but some other aspects of Blackbird left me pondering whether it'd be a place I'd return to.
First of all, the restaurant is in an awkward part of town (9th and K) for accessibility and parking. I live in Midtown but usually tend to avoid that area because of the mess of cars, construction zones and abundance of panhandlers. I ended up having to make several laps around the area before I was able to find a parking spot that was open and not in a tow-away zone. The restaurant was a little easier to locate since the front wall showcases a big mural of blackbirds in flight. The interior is separated into two-stories with the bar/lounge area occupying the lower half and a small dining room in the upper loft space. The decor is quite eyecatching- hip shades of greys accented by a wrought iron staircase and interesting bits of artwork...very urban. Some time and thought were definitely put into creating an aesthetically pleasing oasis for their patrons.
My friends and I were looking forward to nibbling on some small dishes since we had heard rave reviews regarding Blackbird's fresh seafood Happy Hour which consisted of oysters ($1), fish tacos ($5), and mini lobster rolls ($5); however, when I inquired about the HH menu we were advised by our server that they were no longer offering the lobster rolls. Strange since, just that morning I had received an email from Downtown Grid touting Blackbird's HH lobster rolls and it's still listed on their online HH menu. A bit disappointed but not dissuaded, we decided to order some fish tacos and the lobster and beet salad ($15). The fish tacos were delicious- they consisted of two perfectly executed mini tacos made of fried cod topped with cabbage and some sort of relish. The fish had a subtle, spicy curryish aftertaste that was very appealing. The Maine Lobster and Roasted Beet salad was gorgeous in presentation- large chunks of lobster intermingled with fresh burrata and delicious candy colored beets cut into bite-sized wedges. You definitely didn't feel shortchanged with this salad. The highlight of our visit though were the cocktails. I started off with some sort of specialty cocktail made from bourbon and huckleberries that they called Patsy's Punch (I think?)...it was so-so and didn't make much of an impression on me. For my second round, I quickly switched to the Moscow Mule after tasting a friend's. Blackbird's Moscow Mules are served in a cold copper mug with crushed ice, they're not overwhelmingly ginger tasting...the perfect refreshing summer cocktail. Loved it! Too bad they don't have a patio, I could definitely see knocking back a few mugs of these while engaging in some summertime patio drinking.
My only real issue with Blackbird was the service. The two servers who came by our table were polite but service was so extremely slow. The restaurant and the bar were pretty quiet when we were there so I'm not quite sure what the issue was. Everything from ordering a drink, getting our food to even getting our check seemed to involve a very long wait. In fact, we wanted to have a few more more drinks but we got so tired of waiting that we closed out our check and decided to go get a few more cocktails elsewhere in the Grid. One of my friends pointed out that Blackbird would probably do more business if they expanded their Happy Hour food menu and time frame (currently it's only 4-6pm) and try and attract the after work crowd. I think she has a point. If they had a bigger Happy Hour menu (more than just 2 items) and faster service, I could see visiting more often but I don't see driving out there specifically to have dinner. For dinner, there's just a lot more places in Midtown that are easier to get to, in the same price range and offer more refined service. I guess I'll wait awhile and see how Blackbird settles into it's nest before going back.
http://blackbird-kitchen.com/
Yesterday I met up with some friends at Blackbird Kitchen for a casual Happy Hour. Being a fan of Chef Kevin O'Connor's cooking after dining at one of his amazing Treehouse dinners last year, I was really looking forward to seeing what his newest project with owner, Carina Lampkin had to offer. I loved the food but some other aspects of Blackbird left me pondering whether it'd be a place I'd return to.
First of all, the restaurant is in an awkward part of town (9th and K) for accessibility and parking. I live in Midtown but usually tend to avoid that area because of the mess of cars, construction zones and abundance of panhandlers. I ended up having to make several laps around the area before I was able to find a parking spot that was open and not in a tow-away zone. The restaurant was a little easier to locate since the front wall showcases a big mural of blackbirds in flight. The interior is separated into two-stories with the bar/lounge area occupying the lower half and a small dining room in the upper loft space. The decor is quite eyecatching- hip shades of greys accented by a wrought iron staircase and interesting bits of artwork...very urban. Some time and thought were definitely put into creating an aesthetically pleasing oasis for their patrons.
My friends and I were looking forward to nibbling on some small dishes since we had heard rave reviews regarding Blackbird's fresh seafood Happy Hour which consisted of oysters ($1), fish tacos ($5), and mini lobster rolls ($5); however, when I inquired about the HH menu we were advised by our server that they were no longer offering the lobster rolls. Strange since, just that morning I had received an email from Downtown Grid touting Blackbird's HH lobster rolls and it's still listed on their online HH menu. A bit disappointed but not dissuaded, we decided to order some fish tacos and the lobster and beet salad ($15). The fish tacos were delicious- they consisted of two perfectly executed mini tacos made of fried cod topped with cabbage and some sort of relish. The fish had a subtle, spicy curryish aftertaste that was very appealing. The Maine Lobster and Roasted Beet salad was gorgeous in presentation- large chunks of lobster intermingled with fresh burrata and delicious candy colored beets cut into bite-sized wedges. You definitely didn't feel shortchanged with this salad. The highlight of our visit though were the cocktails. I started off with some sort of specialty cocktail made from bourbon and huckleberries that they called Patsy's Punch (I think?)...it was so-so and didn't make much of an impression on me. For my second round, I quickly switched to the Moscow Mule after tasting a friend's. Blackbird's Moscow Mules are served in a cold copper mug with crushed ice, they're not overwhelmingly ginger tasting...the perfect refreshing summer cocktail. Loved it! Too bad they don't have a patio, I could definitely see knocking back a few mugs of these while engaging in some summertime patio drinking.
My only real issue with Blackbird was the service. The two servers who came by our table were polite but service was so extremely slow. The restaurant and the bar were pretty quiet when we were there so I'm not quite sure what the issue was. Everything from ordering a drink, getting our food to even getting our check seemed to involve a very long wait. In fact, we wanted to have a few more more drinks but we got so tired of waiting that we closed out our check and decided to go get a few more cocktails elsewhere in the Grid. One of my friends pointed out that Blackbird would probably do more business if they expanded their Happy Hour food menu and time frame (currently it's only 4-6pm) and try and attract the after work crowd. I think she has a point. If they had a bigger Happy Hour menu (more than just 2 items) and faster service, I could see visiting more often but I don't see driving out there specifically to have dinner. For dinner, there's just a lot more places in Midtown that are easier to get to, in the same price range and offer more refined service. I guess I'll wait awhile and see how Blackbird settles into it's nest before going back.
Wednesday, May 23, 2012
Day Trip: Life's Just Beachy
I'm a bit late getting this post up...but we went to the beach this weekend!
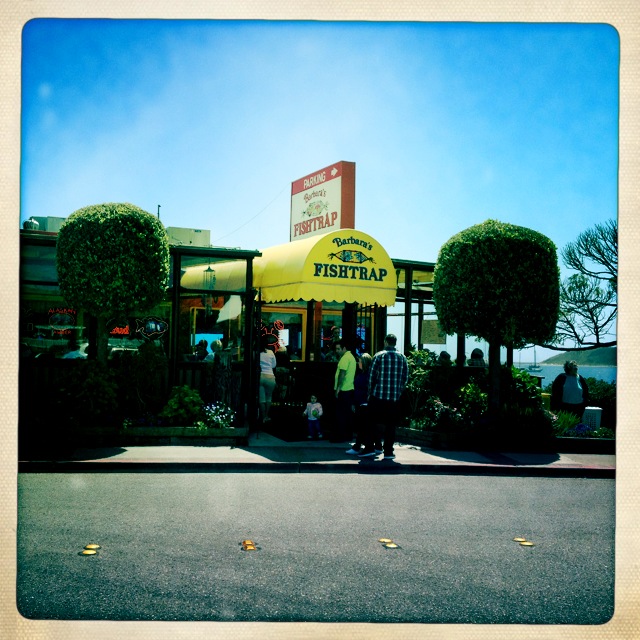
Mr.S. didn't have the kidlets so we thought we'd take a day trip out to Half Moon Bay and relax on the beach. We ended up having lunch at this great little casual eatery called Barbara's Fish Trap in Princeton-By-The-Sea. The Fish Trap is located in a teeny red building on stilts right on the pier. There's a covered patio area in the front and regular seating in the back.
We were starving by the time we stopped for lunch and everything sounded wonderful on the menu, so we decided to get a little of everything. We split the calamari, which Mr.S. loved. He thought it was the absolute bees knees until he got his fish and chips which he said was the best he'd ever tasted. I took a nibble and I had to agree. The batter was light and crispy and the fish was nice and moist. There wasn't any of that heavy greasiness that I typically detest in fish and chips. He also got a cup of their clam chowder which he wasn't jazzed about but I thought was okay- it was nice and hearty, chock-full of clams and dairy-free (which was great for me. I think they use potato as their base instead of milk or cream). I ended up ordering the Dungeness crab sandwich...and it was divine. A good-sized serving of crab on a soft bun. The crab was nice and fresh and the bun was delicious; however, I did think the sandwich was kind of pricey. The place itself was kitschy and cute though - lots of windows to see the harbor and a big fisherman's net adorning the ceiling. The service was friendly but so sloooow. They were pretty busy though so we tried to cut our waitress some slack but they really needed an additional server on duty.
After lunch we headed over to San Gregorio State Beach, just off the Cabrillo Highway. I think this is my favorite beach we've gone to so far. The first park of the beach opens up to tons of driftwood, a small lagoon and lots of people but if you go down just a bit further to the right, you'll come upon a secluded, sandy beach with nary a soul. We felt like we had the beach to ourselves...and the best part was---there's two sea caves that are accessible when the tide's low. The first cave doesn't go back very far but the second one does...it's fun in there but a bit spooky. Also according to the park ranger if we had gone further down, we would have stumbled upon a nudist beach. We didn't get down that far, instead we decided to take a trail that goes up one of the ridges. If you go, check it out! The view up there of the ocean is absolutely breathtaking (and the climb is super easy).
San Gregorio State Beach:
Beach access fee $8 (but the pass they give you is good at all state beaches for the entire day)
No dogs on beach
No fires on the beach
There are BBQ pits, restrooms and picnic tables in the first part of the beach
Beach closes at sundown
Barbara's Fish Trap- is cash only
281 Capistrano Road(650) 728-7049
Mr.S. didn't have the kidlets so we thought we'd take a day trip out to Half Moon Bay and relax on the beach. We ended up having lunch at this great little casual eatery called Barbara's Fish Trap in Princeton-By-The-Sea. The Fish Trap is located in a teeny red building on stilts right on the pier. There's a covered patio area in the front and regular seating in the back.
We were starving by the time we stopped for lunch and everything sounded wonderful on the menu, so we decided to get a little of everything. We split the calamari, which Mr.S. loved. He thought it was the absolute bees knees until he got his fish and chips which he said was the best he'd ever tasted. I took a nibble and I had to agree. The batter was light and crispy and the fish was nice and moist. There wasn't any of that heavy greasiness that I typically detest in fish and chips. He also got a cup of their clam chowder which he wasn't jazzed about but I thought was okay- it was nice and hearty, chock-full of clams and dairy-free (which was great for me. I think they use potato as their base instead of milk or cream). I ended up ordering the Dungeness crab sandwich...and it was divine. A good-sized serving of crab on a soft bun. The crab was nice and fresh and the bun was delicious; however, I did think the sandwich was kind of pricey. The place itself was kitschy and cute though - lots of windows to see the harbor and a big fisherman's net adorning the ceiling. The service was friendly but so sloooow. They were pretty busy though so we tried to cut our waitress some slack but they really needed an additional server on duty.
After lunch we headed over to San Gregorio State Beach, just off the Cabrillo Highway. I think this is my favorite beach we've gone to so far. The first park of the beach opens up to tons of driftwood, a small lagoon and lots of people but if you go down just a bit further to the right, you'll come upon a secluded, sandy beach with nary a soul. We felt like we had the beach to ourselves...and the best part was---there's two sea caves that are accessible when the tide's low. The first cave doesn't go back very far but the second one does...it's fun in there but a bit spooky. Also according to the park ranger if we had gone further down, we would have stumbled upon a nudist beach. We didn't get down that far, instead we decided to take a trail that goes up one of the ridges. If you go, check it out! The view up there of the ocean is absolutely breathtaking (and the climb is super easy).
San Gregorio State Beach:
Beach access fee $8 (but the pass they give you is good at all state beaches for the entire day)
No dogs on beach
No fires on the beach
There are BBQ pits, restrooms and picnic tables in the first part of the beach
Beach closes at sundown
Barbara's Fish Trap- is cash only
281 Capistrano Road
Friday, March 16, 2012
Mamma Mia! Ginger-Shrimp Potstickers
If you follow my blog's Facebook page, you've probably seen me post a status every so often to the effect of baking/making/cooking while singing along to Mamma Mia. It's one of my favorite musical soundtracks and is such a fun one to belt out while in the kitchen. Well, last night I got to get my ABBA on at the Community Center Theatre and see Mamma Mia live for a second time (the first time was a few years ago). This production was just as great as the first one and restored my faith in the musical (I was a bit brokenhearted after that craptastic film version with Streep came out). Anyhow, I'm looking forward to gettin' down to some more, "Dancing Queen," and "SOS" while making another batch of these ginger-shrimp potstickers. The first batch were so dang good (we paired it up with some Trader Joe's peanut satay sauce), they were scarfed up in a blink of an eye!
(This would be a good recipe to make a double or even triple batch of...you can freeze them and cook as needed.)
Ginger-Shrimp Potstickers (recipe from Cooking Light, March 2008)
Ingredients
Pot stickers:
3/4 cup shredded green cabbage
1/3 cup chopped green onions
1/4 cup matchstick-cut carrots
2 tablespoons chopped fresh cilantro
1 tablespoon low-sodium soy sauce
2 teaspoons minced peeled fresh ginger
1 teaspoon dark sesame oil
1/2 teaspoon salt
1/2 pound cooked peeled small shrimp
Dash of hot sauce
24 wonton wrappers (fresh or store-bought)
2 tablespoons cornstarch
1 tablespoon canola oil, divided
1 cup water, divided
Instructions
1. To prepare pot stickers, combine first 10 ingredients in a food processor; pulse 4 times or until coarsely chopped. Working with 1 wonton wrapper at a time (cover remaining wrappers with a damp towel to prevent drying), spoon about 1 1/2 teaspoons shrimp mixture into center of each wrapper. Moisten edges of dough with water; bring 2 opposite corners to center, pinching points to seal. Bring remaining 2 corners to center, pinching points to seal. Pinch 4 edges together to seal. (I used a gyoza press instead. You can buy these for under $2 at most Asian markets.) Place pot stickers on a large baking sheet sprinkled with cornstarch.
2. Heat 1 1/2 teaspoons canola oil in a large nonstick skillet over medium-high heat. Add 12 pot stickers to pan; cook 2 minutes or until bottoms are golden brown. Slowly add 1/2 cup water to pan; cover and cook 4 minutes. Uncover and cook 3 minutes or until liquid evaporates. Repeat procedure with remaining 1 1/2 teaspoons canola oil, 12 pot stickers, and 1/2 cup water.
3. Serve hot with favorite dipping sauce.
Monday, December 5, 2011
Staycation : Moules Marinières
“Now and then it's good to pause in our pursuit of happiness and just be happy.”
~ Guillaume Apollinaire
Ever have one of those leisurely weekends that almost feels like a vacation? They don't come around often but when they do, they sure are great aren't they? Sans kidlets this weekend, Mr. S. and I settled in at the cottage and "staycationed." We attended a Christmas party on Friday night at a friends' home (cider spiked with homemade spiced bourbon...yum!) but for the most part we just relaxed and enjoyed each other's company. We dined out, did a little shopping and caught a flick. (If you haven't caught Clooney's latest, "The Descendants"- I highly recommend it. It's excellent.) Saturday night however, we decided to cook dinner together. Since Mr. S. had never really had mussels before, I was antsy for him to try moules marinières (drool...). He debearded the lil bivalves while I scrubbed, pretty soon we had a nice little pile ready to be steamed. Now I could have went old school and just steamed them with wine and garlic but I went just a wee bit fancier by also adding some butter and a few spices. We sopped up the broth though simply with some crusty French bread...mmmm, perfect...and only one pot dirtied, gotta love that! ;)
Moules Marinières
Ingredients
• 3 shallots, thinly sliced or chopped
• 4-5 large garlic cloves, minced
• olive oil
• 2 pounds mussels, debearded & well scrubbed
• 1 cup dry white wine
• 6 T unsalted butter
• 1 tsp salt
• 1/2 tsp fresh ground pepper
• 1 T fresh parsley, roughly chopped
• 1/2 tsp thyme
• 1 tsp lemon zest
• Pinch dried red pepper flakes
• Splash of cream (optional)
• French bread or baguette
Instructions
- Wash the mussels under cold running water. Discard any shells that don't close upon pressure or that are broken or cracked.
- Pull off the beards. Using a knife, scrape off the barnacles from the shells. Use a scrubber and give the shell a good brush off. Rinse.
- Heat a large pan/pot over medium heat. Coat the bottom with olive oil and butter. When it starts to shimmer, add the shallots. Sauté until they soften and become translucent. Then add the garlic. Sauté for another minute.
- Add the mussels, white wine, thyme, red pepper flakes, salt, pepper and lemon zest. Cover and wait until the mussels open up- about 3 to 5 minutes. (Do not overcook or the mussels will become rubbery.) Give the pan one shake.
- Remove the mussels from the pot with a slotted spoon and place in a bowl. (Discard any mussels that did not open.)
- Add a splash of cream (optional) to the broth .
- Carefully ladle the broth over the mussels. Garnish with parsley.
- Serve with crusty bread for dipping and a bowl for the empties.
** Fresh mussels can be stored in the fridge in a colander with a bowl underneath (out of the bag), covered with a damp cloth, for 1-2 days. Do not store them submerged in water or they'll drown. They need to breathe...because they're aaaaaa-live!
Subscribe to:
Posts (Atom)