Showing posts with label appetizer. Show all posts

Wednesday, September 11, 2013

Shady Lady Tomato Sauce


Shady Lady tomatoes...they're like the sexy, busty sirens of the farmers' market. With their deep lipstick red color and voluptuous shape, how can you resist them? You can eat them sliced on a plate with some buffalo mozzarella with a good balsamic drizzle or stacked with a thick cut of smoky applewood bacon and some creamy avocado on a fresh, hearty slice of sourdough. There's so many delicious ways to enjoy this heavenly fruit. One of my favorite ways to consume Shady Lady tomatoes is to oven-roast them and then make them into a sauce. The sauce is rich in flavor and smooth like butta', much too good to plop on a bowl of ordinary pasta. I like to use it to dress up appetizers like crostini or mini meatballs. With this batch, I used it to sauce some eggplant parmesan bites I made for some patio dining. We grew some wonderful Japanese eggplants in our garden this summer at Mr. S.'s which I sliced up into rounds. I dipped the round in egg yolk, then tossed them in a mixture of Parmesan cheese and dried breadcrumbs and fried them in some olive oil until they were nice and crisp. (I then placed them on some paper to absorb the excess oil.) Next, I spooned a tablespoon of my Shady Lady tomato sauce on the round and sprinkled some Parmesan on top and served the eggplant bite hot. They were a hit! Next year we'll have to grow more eggplants.

Our Japanese eggplants in the garden when they were about 1/4 of the way grown- don't they look like X-mas ornaments?


Shady Lady Tomato Sauce

Ingredients

5-6 big Shady Lady Tomatoes ( peeled*, cored, seeded, halved)

5-6 garlic cloves, minced

2 small yellow onions, sliced

3 tablespoons olive oil

glug of dry, red wine

2 teaspoons sugar (optional)

1/2 teaspoon sea salt

1 bay leaf

handful of fresh basil, chopped

1 tablespoon good-quality balsamic vinegar

1 teaspoon fresh ground pepper


Instructions

1. Preheat oven to 425 degrees F.

2. Place tomato, garlic and onion in a glass baking dish. Spread out in a single layer, don't crowd. You want them to roast, not steam. Drizzle with olive oil. Roast for 20-30 minutes until they start to caramelize (slightly browned and shriveled).

3. Place roasted tomatoes, garlic, onions in a food processor and give it a few good pulses. Place in a medium-size pot over medium heat. Add wine, sugar, sea salt, bay leaf, and fresh basil. Add a splash of good quality balsamic vinegar. Allow to simmer for 20-25 minutes. Remove bay leaf.

4. Taste. Season with fresh ground pepper. Adjust seasonings if needed.

Marcella Hazan writes in The Essentials of Classic Italian Cooking: "No other preparation is more successful in delivering the prodigious satisfactions of Italian cooking than a competently executed sauce with tomatoes."
 

* The easiest way to peel a tomato is to :

1) Slice a shallow "X" on the bottom of the tomato. Then submerge the tomato in boiling water for 20-30 seconds. Remove and plunge in an ice bath for 30-45 seconds. Remove from the ice bath. The skin should peel off.

OR

2) Freeze the tomato. Remove the tomato from the freezer and let it thaw. Once thawed the skin should slip right off the tomato.


Sunday, July 14, 2013

Refreshing Pineapple Gazpacho


Eleven years ago, I got married to my (now ex) husband. The marriage didn't last but we had a wonderful wedding in Hawaii at the Hale Koa Hotel. Now mind you, this was back before destination weddings became über trendy and everybody and their brother started having them there. Anyhow, if you haven't been to the Hale Koa and get the opportunity to check it out, do so. It's a lovely 70+ acre oasis nestled in the western corner of Waikiki. We had the wedding in a lush, tropical garden that backed up to a shimmering sandy beach. I couldn't have asked for a better backdrop for our nuptials. If it's so fantastic, why isn't everyone having their wedding at this particular venue, you ask? Well, the catch with the Hale Koa is that it's a hotel and resort owned by the Department of Defense and only for active duty or retired military and their families. Luckily, my dad's retired military so we were able to hold our wedding at this fab location for much less than all the other swanky places on the island.

One hurdle we encountered though during planning was that the hotel had a strict policy that only they could cater events held on their grounds so we had to let them do the food. What a bummer! Most of it was what you'd expect from a hotel's catering department except two courses which really stood out to me: our passion-guava wedding cake and the pineapple gazpacho (neither of which I think they offer anymore). Now, normally I'm not a fan of gazpacho (mostly because I detest tomatoes) but this chilled soup was so refreshing- an exquisitely balanced medley of sweet and tart with just a slight hint of spiciness...and no tomatoes! It was the perfect opening dish for an island wedding. I loved it! It was fun, it was light, it was tasty! Every summer since, I've always meant to try and replicate that soup but never got around to it. Finally during our recent mini heat wave, I decided to try and recreate it. I made several different recipes I found online and in various cookbooks and then took the ingredients and tastes I liked best to create my own version.

If you're sick of salads, this soup is a nice alternative during the dog days of summer; not to mention, that pineapple has a lot of anti-inflammatory qualities. Gazpacho is a great dish to whip up for parties, you could serve it in shot glasses for cocktail hour or if you want to fancy it up for a sit-down dinner, place it in chilled martini glasses. The best thing though is--it's simple to make and there's no hot stove or oven required.

Refreshing Pineapple Gazpacho

Ingredients

1 pound of pineapple, cut into chunks

1/2 of a large English cucumber, peeled and sliced

1 medium yellow bell pepper, cored and chopped

1/3 cup diced red onion

1-2 scallions (mostly white), thinly sliced

1 jalapeno, seeded and minced

1 1/2 cups of DOLE pineapple-orange juice

3 tablespoons Italian dressing

1 tablespoon seasoned rice vinegar

1 tablespoon fresh lime juice

sea salt and pepper, to taste (optional)


Instructions

1. Place all ingredients in a blender. Cover, blend until relatively smooth.

2. If you would like the soup to have a smoother texture/be thinner, you can put the soup through a chinois or sieve. If you would like it to be thicker, take a slice of crusty peasant bread, soak it in water, squeeze the water out, add it to the gazpacho and blend again.

3. Taste. Season with salt and pepper, if needed.

4. Refrigerate for 2-3 hours so that the flavors have a chance to meld. Serve chilled.

5. Garnish with diced cucumber and bell pepper...or for some crunch, sprinkle with chopped macadamia nuts and some cilantro.

Tuesday, March 19, 2013

Keepin' It Simple: Radish Tartines


Mmm, spring is in the air! Everything's blooming (I'm sure Allegra sales have sky-rocketed this week), the birds are out chirping and Sacramentans are dusting off their gardening tools and getting to work on their spring gardens. Look at these beauties that have opened their sleepy little heads around my cottage....


What better way to welcome the first day of spring (which comes early this year- March 20), then to put together a crisp, vibrant lunch of radish tartines? One of the reasons I love radishes so much is that they're so easy to work with, you don't have to dress them up much to make them into a fab meal. Check out these cute, peppery gems I found this weekend. They're almost too pretty to eat...almost. Now the trick with this dish is to pick a mild type of radish and don't skimp on the quality of the butter.

Side note: Don't throw away your radish greens, people! They're edible- save them for dinner and sauté them up with some onions, garlic and olive oil or throw them into a soup, the same way you would chard or spinach.


Radish Tartines

Ingredients

French baguette, sliced

Fresh radishes, washed, dried and ends removed

European-style butter (like Plugrá), unsalted, room-temperature

Fleur de sel or a good-quality sea salt


Instructions

Now I know you all know how to make an open-faced sandwich, but just for kicks:

1. First start with your bread, you can go toasted or untoasted- it's up to you. I prefer lightly toasted.

2. Lavishly slather the softened butter onto your baguette slice. Forget about that bikini you're hoping to fit into in June, treat yourself and get a nice big decadent swipe o' butter on there.

3. Sprinkle on a bit of fleur de sel.

4. Then gently lay a few slices of radish on top.

5. Find a sunny spot to eat. Plop down and relish those fresh radishes. You can even greet passing neighbors in French, if you're feeling sassy and really want to get into it.

Tip: These also make great appetizers for a party. For some variety you can sub goat cheese for the butter and garnish the radishes with minced chives.

Tuesday, November 6, 2012

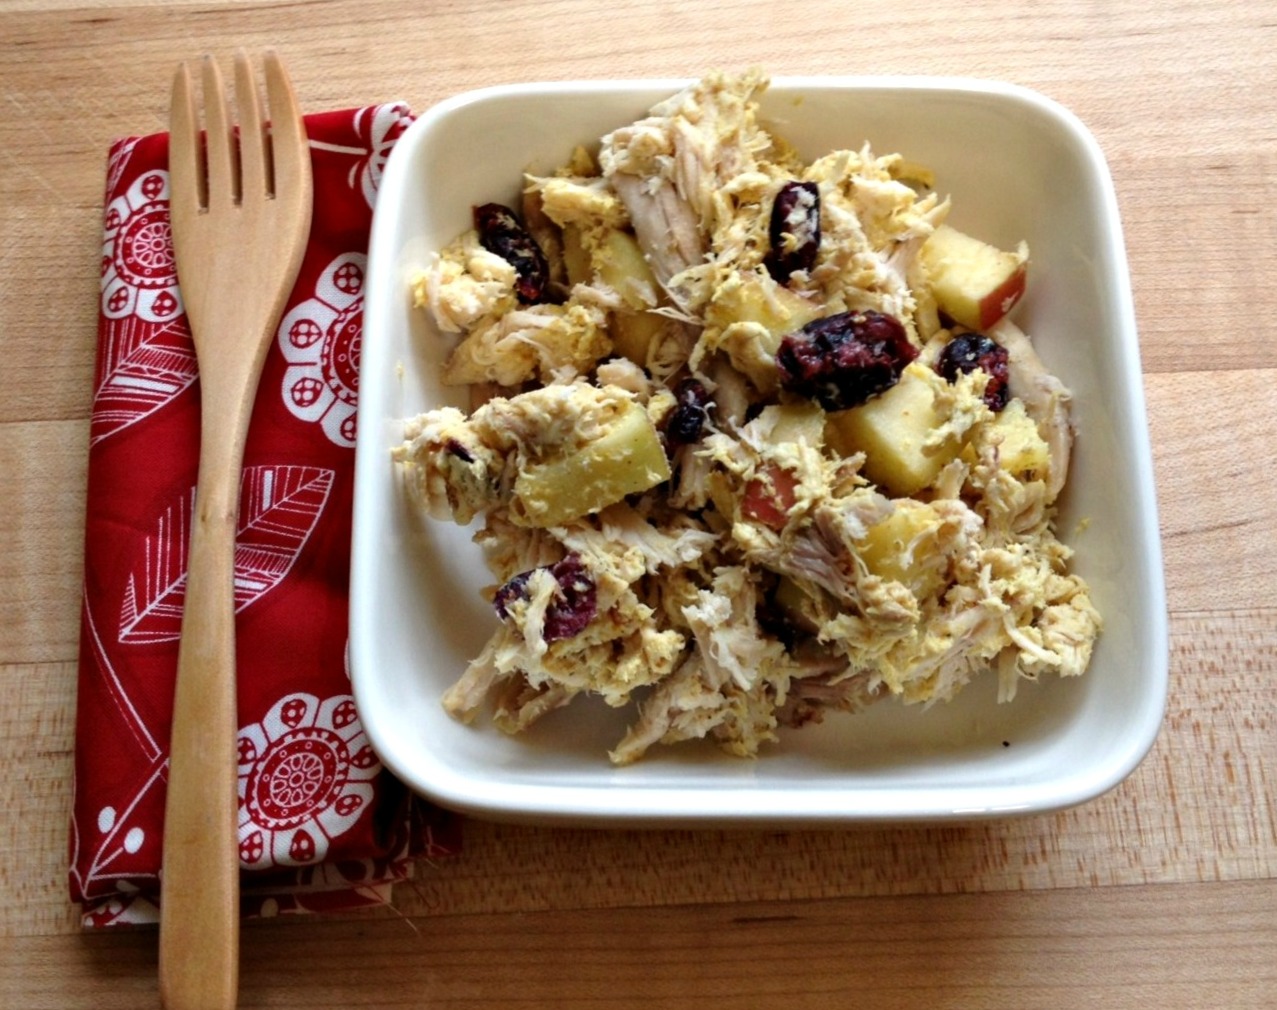
Spicy Curry Chicken Salad


This past weekend I was at a party and my buddy Eric and I happened to get in a conversation about food. He mentioned that he had been making curry chicken salad fairly frequently lately. My first thought was, "Curry chicken salad...yum! But ugh, I would have to roast some chicken...what a pain in the butt. Who has time for that?"  That's when he mentioned that he was using cooked rotisserie chicken from the market and my ears perked up. Rotisserie chicken? That sounds quick! Then my second thought was, "Oh, all that mayo! I can't eat that, I'm trying to lose a few pounds!" But where there's a will there's a way and on the drive home later that night, I started thinking about perhaps using yogurt (more specifically Greek yogurt, which has a nice creamy texture) in place of the mayo. I could cut the calories but still get my curry chicken salad fix. I know several friends who love subbing Greek yogurt into their recipes so I figured,"Why the hell not?" I tinkered around with the recipe on Monday and what I ended up with is listed below. I was quite pleased with the result and ate it for dinner last night and lunch today. It was the perfect balance of sweet and savory for me.
* If you like spicy, add a pinch of cayenne, it adds a nice kick to the dish.

PS It's Nov. 6th! If you haven't already--be sure to vote!


Spicy Curry Chicken Salad

Ingredients

3 cups shredded rotisserie chicken

1 cup plain Greek yogurt  (I used Fage Total 2%)

1.5 tablespoons curry powder

1 medium Fuji apple, cored and chopped

1/2 cup dried cranberries

2 tablespoons fresh lemon juice

2 tablespoons red onion

1/2 teaspoon fresh ground pepper

1/2 teaspoon salt

1/3 cup almonds, sliced and roasted (optional)

pinch of cayenne (optional)


Instructions

1. In a small bowl, combine Greek yogurt, curry powder, lemon juice, pepper, salt and a pinch of cayenne. Stir together.

2. In a large bowl, combine shredded chicken, chopped apple, dried cranberries and red onion.

3. Combine the ingredients from the two bowls. Mix together well.

4. Serve chilled. Tastes great spread on some soft lavash or place a scoop atop a bed of fresh salad greens.

Wednesday, October 24, 2012

Party Time! : Mini Cheesy Spinach Quiches


October is party month: birthday parties, Oktoberfest parties and lots and LOTS of Halloween parties. Parties require party food. My favorites are cute-bite sized treats that your guest can pick up with one hand so they don't have to put down their tasty drink. No one likes to put their drink down at a party! A really simple finger food to make (and is vegetarian-friendly) are mini quiches. They look fancy and like you have mad cooking skills but in reality it's just you, pre-made pie dough and a biscuit cutter. 10 minutes tops to assemble! 
What's your favorite easy-to-assemble party dish?


[On an unrelated side note, a friend recently gave me a heads up that my blog's comment box has not been working correctly. Sorry about the inconvenience. The issue's been repaired, so feel free to comment away folks!]   ;)


Mini Cheesy Spinach Quiches
makes 48 tiny quiches

Ingredients

1 pkg. pre-made pie crust (I like Trader Joe's brand, it comes with 2 pie crusts)

1 (10 oz.) box of frozen, chopped spinach

2 cups shredded Mexican blend cheese (you can find this where the shredded cheese is at your store)

1 (16 oz.) container cottage cheese

1 bunch of green onion, white parts only sliced

4 eggs, lightly beaten

salt and freshly grounded pepper

 
Instructions

1. Preheat oven to 325 degrees F.

2. Defrost frozen spinach. Then place spinach in a colander and press out remaining water.

3. Using a small biscuit cutter or lip of a shot glass, stamp out your dough.

4. Press each dough round into the hole of your pre-greased mini-muffin tin. (I usually give the tin a light squirt with some cooking spray.)

5. In a bowl, combine spinach, shredded cheese, cottage cheese, green onion, eggs, salt and pepper together. Mix well.

6. Using a spoon, fill each pie crust about 3/4 full.

7. Place tin in oven and bake 20-22 minutes, until edges are a light golden brown. Insert a toothpick in the middle of a quiche, if it comes out clean the quiche are done.  Remove from oven and allow to cool for 5 minutes. Pop the quiches out of the tin with a paring knife.

Note: You can make these quiches to suit your taste by subbing in red peppers, bacon, mushrooms, Gruyere...whatever you like. They're very versatile.


Sunday, October 14, 2012

Texas Love Dip


Every year, Mr.S. and I usually throw a big summer BBQ. This summer, however, somehow time got away before we could get one planned. So since the weather was still warm and my birthday was coming up, we decided to host a birthday fiesta. We obtained 20 lbs. of delicious carnitas from La Esperanza and served it up with rice, beans, various dips and fun finger foods. It was a food extravaganza! My friend Cate made an amazing orange-chocolate cake (that was to die for) and we toasted with sangria, hibiscus margaritas and beer. I'm pretty sure everyone had a grand time- kidlets were running amuck, old friends were catching up and new friends were getting to know each other. I couldn't think of a better way to bring in the next year of my life.

Amongst the multitude of tasty eats covering the tables was some Texas Love Dip.  Love Dip...I'm sure most of you are scratching your heads right about now, but if you've ever been to Texas' Central Market, you know exactly what dip I'm taking about. Central Market's Love Dip is unforgettable...and addicting. It's a creamy-tomato concoction with a spicy afterkick that'll make you swoon and become a lifetime convert after just one taste. Give it a go, I think you'll LOVE it   ;)


Texas Love Dip

Ingredients

12 ounces cream cheese, softened

1/2 cup chunky fresh tomato salsa (I buy mine premade-a simple salsa of chopped tomatoes, white onions, cilantro and jalapenos at La Superior Market on Franklin)

1-2 cloves of garlic, minced

1/4 teaspoon Kosher salt

1/2 teaspoon dried tarragon

1/4 teaspoon fresh lemon juice

dash of white pepper


Instructions

1. Place the cream cheese, salsa, garlic, salt, tarragon and white pepper in food proccesor.

2. Process until it's mixed well and creamy.

3. Add in lemon juice, give the processor another whiz or two.

4. Transfer to a serving bowl. Place in fridge and allow flavors to meld for at least an hour.  Serve with tortilla chips, bread bites or your favorite veggies.

5. Tip: If you have a little leftover the next day, it works great as a sandwich spread also.


Monday, September 17, 2012

Jalapeno-Cream Cheese Crescent Poppers


Seems like Old Mother Nature was trying to give us one more whammy of sweltering hot weather this weekend. Hope you were able to keep cool and have a good time. I did, well sorta.... Oh the joys of dating a Catholic boy! You are obligated to attend baptisms, confirmations and apparently the Holy Bowl. Mr.S.'s alma mater, Christian Brothers High School (or "Brothers," as him and his buddies call it) has a big rivalry with Jesuit High School and they duke it out in a once a year football game called the Holy Bowl. So Saturday night, we packed up the kidlets and drove over to Hughes Stadium where we met up with several of Mr.S.'s friends and tailgated before the big game. For our contribution, I made up some wild rice salad, cookies and these jalapeno-cream cheese crescent poppers. I actually had bought enough ingredients for two batches (the crescent rolls were BOGO) but I decided to only make one batch, in case they were a total disaster. They turned out to be a hit (and spicy!). And although I thought the initial bite-sized portions were cute, the second go around I decided to try and make the the poppers bigger. I was pleased with the outcome. So if you want to make ones that are teeny-tiny and perfect for cocktail hour, check out the original recipe on My Homemade Life. My version makes puffs that are twice as big. Maybe they're man-sized poppers? Haha.  :) Anyhow, we had fun at the Holy Bowl (even though CBHS lost) and I learned a few things about football...mainly, bring a pillow- those bleacher seats are uncomfortable after the first hour!


Jalapeno-Cream Cheese Crescent Poppers

Ingredients

6 oz. cream cheese (softened)
2 oz. canned, diced jalapenos (half of one of those small cans)
1 tablespoon sugar
1 tube regular Pillsbury crescent rolls

Ingredients

1. Preheat oven to 375 degrees F.

2. In a bowl, stir together your softened cream cheese, diced jalapenos and tablespoon of sugar.  Mix well.

3. Pop open your crescent can. When you unfurl your rolls, you should have 4 rectangles (which have perforations to make triangles). Place two of the rectangles one on top of the other. Use a rolling pin to smooth out the connecting and perforated areas. Smooth the cream cheese mixture across the crescent roll mix. (See photo)


4. Then roll up your dough and cut into rounds. Place rounds (one of the spiral sides up) on a Silpat and place in oven.
 
5. Bake 13-14 minutes, until golden brown. Serve immediately.


Monday, August 20, 2012

Quick Pickled Red Onions


Did you have a nice weekend? Mine took a turn for the crazy right near the end. I spent Friday and Saturday at a friend's in Lodi, where we did an insane amount of canning- pickled red onions, marinara, spicy red pepper spread and dilly beans. Supervised by Miss Mija, tiny dog extraordinaire:


My feet ached intensely by Saturday night from standing all day, thank goodness we were able to drink a lot of wine to dull the pain. Sunday, I thought I had a little bit of time to laze about before attending a dinner party in the eve, but that plan was shot to hell when a crazy drug addict tried to break into my cottage- in the middle of the day, WHILE I WAS HOME. When I confronted her, she tried to tell me her cousin lived here...what the hell? I ended up calling the police, they came out and took a report and they think they might know who the perp is. Luckily, the dinner party was fun and took my mind off of things. Funny enough, I wasn't scared by the burglary incident, I was MAD though!

Anyhow, while in Lodi, my friend Cate and I made several jars of pickled red onions. They came out terrific and since you can eat them right away, I did! (I've had a hankering for pickled onions ever since Mr.S. and I stopped at a nearby Mexican restaurant and they threw a few on my carnitas.


Pickled Red Onions (adapted from "Put 'Em Up!" by Sherri Brooks Vinton)

Ingredients

6 lbs. small red onions
6 cups distilled white vinegar
3 cups water
9 tablespoons sugar
3 tablespoons salt

Instructions

1. Sliced onions. We used a food processor.

2. In a large non-reactive bowl- mix together: vinegar, water, sugar and salt. Make sure the sugar and salt dissolves thoroughly.

3. Add the sliced onions and stir well so that everything's coated.


4. Let it sit for about an hour. Once the onions get wilty, you can go ahead and put them in jars.

5. We were able to make 11 half-pint jars and 2 pint jars. Refrigerate, will stay good for at least a month.

6. Be sure to keep the leftover extra pickling juice- you can use it when making vinaigrette for your salad.


Friday, August 10, 2012

Pesto Chicken Open Tart


Basil, with the warmer temps we've been having, it's growing like mad everywhere. And it's also evidently hiding out in my kitchen freezer, since I just found a giant jar of pesto I made awhile back, lurking behind some cappuccino popsicles. As soon as I discovered it, I was on a mission to make something with it...something great...but what?  Pesto pasta, pesto pizza, pesto salad? After taking a quick inventory of my kitchen goods, I decided to go with a tart. You can never go wrong with a tart.


Pesto Chicken Open Tart

Ingredients

1 skinless chicken breast
2-3 tablespoons olive oil
2  tablespoons Herbes de Provence
Kosher salt & fresh ground pepper, to taste

1 sheet frozen puff pastry, thawed to room temperature (Pillsbury's makes a good one)
3 heaping tablespoons homemade Presto Pesto
1/2 cup shredded mozzarella cheese


Instructions

1. Preheat oven to 375 degrees F.

2. In a small mixing bowl, combine - olive oil, Herbes de Provence, salt and pepper.

3. Slather mixture on chicken breast. Place breast in a oven-safe pan/dish.

3. Cook chicken breast for 30-35 minutes, until juices run clear.

4. Remove chicken from pan, Cube.

5. Preheat oven to 400 degrees F.

6. Take the puff pastry sheet and place it on a non-stick surface - parchment paper, Silpat, etc. atop a baking sheet.

7. Roll it out slightly. Schmear the pesto in a thin layer onto the dough.

8. Sprinkle the cubed chicken across the dough the season lightly with salt and pepper. (You can customize it too if you want by adding diced tomatoes, bell pepper strips or artichoke heart slices.)

9. Sprinkle cheese on top.

10. Bake 20 minutes, checking to see if the cheese is melted and the crust is golden.

11. Remove from oven, allow to cool. Cut into slices and serve.

Tuesday, August 7, 2012

Girls' Night Vol au Vents


It's funny- when I was in high school and throughout my twenties, most of my friends were guys. I'd say a good 90%. I found males to be less drama, more logical than emotional and much more fun to hang out with than female friends. I despised the cattiness and sense of competition that seemed to go with female friendships. Guys just seemed more up front. But since hitting my thirties, I've found myself gravitating towards being friends with more and more females. I still have many guy buddies but now some of my closest friends are women and I look forward to our "Girls' Nights." The vibe is different now- it's more relaxed, less drama and there's a strong sense of community. I know I can call any one of my girlfriends if I'm in crisis mode and need someone to talk to, need a lift to the hospital or I just would like a hand with my project-of-the-month. I'm not sure if as women we evolve as we get older to be less judgemental and snippy of each other or I just happened to stumble into some friendships with some amazing ladies. Either way, I feel lucky. My life is definitely more enriched with the female friendships I've cultivated in the last few years.

Last week, my friend Sheri was visiting from Portland (she recently moved there from Sacramento) and another friend of ours Emily decided to host a girls' night get together for her. Of course, good eats are always necessary- so there was pasta salad, various cheeses, pickles and veggies, hummus and homemade lime sorbet. I didn't have time to prepare anything fancy since I was gone all day so I decided to throw together a quickie dessert. I had purchased some Vol au Vents awhile back, so I decided to take those, press some goat cheese into them and top it off with some preserves. I did half with homemade apricot preserves and the other half with homemade ginger-Asian pear preserves. If you're not familiar with Vol au Vents, they're miniature, hollow puff pastry shells that are very light and crispy. The ones I used are made by a company called Erica's Kitchen and are shaped like super cute little flowers. I think they must have came out pretty good since the dish was empty at the end of the night. Next time, I might go the more savory route and make some Wild Mushroom Vol au Vents or maybe stuff them with some brie and brown sugar. What do you think would make a good filling?

Girls' Night Vol au Vents

Ingredients

1 package Vol au Vents (12 mini puff pastry cases)
3 oz. goat cheese
your favorite homemade jam or preserves (I used apricot and ginger Asian pear)

Instructions

1. Preheat oven to 300 degrees F.

2. Line a baking sheet with a Silpat mat, and place Vol au Vents on mat, spaced evenly.

3. Press the middle circle of dough down, then place about teaspoon of goat cheese into each Vol au Vent. Gently push the goat cheese down into the opening.

4. Top with a teaspoon of your favorite homemade preserve.

5. Bake the Vol au Vents for approximately 10-15 minutes or until layers are golden.

6. Serve warm or at room temp.

Monday, August 6, 2012

Avocado Bruschetta


After being away for four days on vacation and eating such nutritious snacks as Hostess Ding Dongs, chips-n-onion dip and Slim Jims, my system's in full DEFCON Level 1 mode and revolting against itself. So to appease my angry belly, I decided to make a simple HEALTHY lunch today of avocado bruschetta (pronounced [bru'sket:ta]). I've been making this dish (usually as a midnight snack) for years and never seem to tire of it. Each bite of the smooth, fresh avocado is punctuated by the crispness of the crusty warm bread...mmm, now I'm hungry again, might have to go make more!

Avocado Bruschetta

Ingredients

4 slices of crusty, rustic french bread- sliced (about 1/2 inch thick)

1 ripe avocado, pitted and peeled

good quality, extra-virgin olive oil

1 large (fresh) garlic clove

red pepper flakes

sea salt and fresh ground pepper


Instructions

1. Preheat oven to 400 degrees F.

2. Slice the clove of garlic crosswise and rub it on each bread slice.

3. Lightly brush the bread on both sides with olive oil (I like to use a pastry brush to do this).

4. Arrange the slices of bread on a baking sheet and cook for about 10-12 minutes or until golden.

5. Cut the avocado into small cubes and place in a bowl. Drizzle with olive oil and mix gently.

6. Spoon a portion of the chopped avocado onto each bread slice. Season with a sprinkling of sea salt, fresh ground pepper and red pepper flakes.

* Alternatively if you'd like more of a char to your bread, you can grill or broil it.

Sunday, July 29, 2012

Figs 'n Pigs : Roasted Figs Stuffed with Chevre & Wrapped in Prosciutto


I know I've probably said this before but man, I feel so lucky to live in California. Oftentimes, I look at magazines like Sunset and will think,"Wow! That place is so beautiful!" when browsing the glossy photos of fresh produce, lush greenery and spectacular flora--then I remember, "I live there, duh." I especially love how we have ready access to an abundance of seasonal produce. My current obsession has been figs. I haven't always been a huge fan in the past, besides the occasional fig newton; but that turned around for me last year, when I had some phenomenal homemade fig chutney at a friend's party. It was served on some artisan bread with some softened goat cheese and it seriously blew me away. So when I saw figs recently while wandering the market, I was delighted. Mr.S. isn't much into chutney so I decided to go with a simple, classic recipe of figs stuffed with chevre. At the last minute though I decided to pick up some prosciutto to wrap the lil suckers in. Hey, you can never go wrong with adding a bit of pork product to your dish, right? Well, these small bites turned out perfect...little savory bundles of warm, salty, creamy goodness. My god, they're so good you won't want to share!

Figs 'n Pigs: Roasted Figs Stuffed with Chevre & Wrapped in Prosciutto

Instructions

12 fresh figs
3-4 ounces chevre (depending on the size of your figs)
12 slices good quality, thinly sliced prosciutto
honey, warmed

Instructions

- Preheat oven to 400 degrees F.

- Gently wipe figs clean with a damp paper towel or washcloth.

- Using a paring knife, slice off the very tip of the fig and then cut two slits (an X) into the top of each fig, going about two-thirds of the way down. Carefully separate the sides and form a small pocket. Press a spoonful of chevre into the pocket. (See below photo) Then softly pinch the sides around the chevre.


- Take a slice of prosciutto, fold it in half lengthwise then wrap it around the stuffed fig.

- Place figs upright (X-side up) on an oiled baking sheet and roast for 10-12 minutes. When the prosciutto is crisp and the chevre gets oozy, they're ready to be taken out.

- Place the figs on a serving tray, drizzle with warm honey and serve immediately.

* If you want to get extra fancy, you can sprinkle the figs with chopped toasted walnuts or Marcona almonds.

* Also, if you're thinking of making these for a party, you can prep a few hours ahead and refrigerate the stuffed figs. But don't roast them until just before you want to serve them because they will get soggy if left to sit.

Thursday, July 26, 2012

Summertime Caprese Skewers


It's summertiiiiiime and the livin' is easy....ok, maybe it's not quite easy but it's definitely hot and I'm feeling lazy. So if you'd rather relax by the pool or catch up on some Gabriel Macht in "Suits," than slog away in a hot kitchen, I have the perfect hors d'œuvre recipe for you. I'm sure you've seen a hundred variations of this on Pinterest and it's easy to see why- it's healthy, requires practically no effort and is on a stick...and who doesn't love nibbles on a stick? Also if you halve the tomato and use it as a base like I do, it makes it look like a cute little retro piece of art.


Summertime Caprese Skewers

Ingredients

1 (12 oz.) container Trader Joe's Marinated Mozzarella Balls
1 package fresh grape tomatoes, sliced in half
1 bunch fresh basil leaves
olive oil or good quality balsamic vinegar (optional)
1 package round toothpicks

Instructions

1. Thread 1 mozzarella ball, 1 folded basil leaf and 1 tomato half onto the toothpick (with the tomato's sliced side facing the bottom).

2. Place on dish upright, using the tomato as a base.

3. Drizzle lightly with olive oil or balsamic vinegar if you wish.

Tuesday, July 24, 2012

Finger Foods: Baked Spinach Dip Bread Bowls


Well, they say absence makes the heart grow fonder. I suppose that's so since I missed Mr.S. like crazy while he was gone for four days with the kidlets up at the cabin; however, the time away gave me some much needed time to catch up with my awesome girl friends. It seems like we're all busy with trips, kidlets, work or dating lately and it's hard to get together like we used to.  So I was excited on Friday night, when eleven fantabulous gal pals came over for some noshing, drinking and chatting.

Feeling adventurous, I wanted to try a new recipe, perhaps a twist on an old favorite? So I decided to go with - spinach dip! We LOVE this stuff at our house. Guaranteed if I make it or someone brings it to one of our fiestas, it'll be gone in the blink of an eye. But the issue was that I wanted something a bit more refined looking...something...well, something that didn't look like slop in a bowl. So, I browsed around online and came across this great recipe for Baked Spinach Dip Bread Bowls...super cute! I was kind of short on time, so didn't have a chance to do a trial run; hence, the first batch I made (on the night of the party) came out a wee bit more cooked on the edges then I would've like. However, I lowered the baking time to 13 minutes and the second batch the next day came out perfect! These little muffin-sized quiches are wonderful and quite addictive- crusty bread, hot spinach dip...your guests will love them!

Baked Spinach Dip Mini Bread Bowls (adapted from Picky Palate)

Instructions

1 can of refrigerated Pillsbury Simply Rustic Loaf or Crusty French Bread

2 tablespoons extra virgin olive oil

2 cups baby spinach, coarsely chopped

1 clove fresh garlic, minced

3 oz softened cream cheese

1/2 cup sour cream

2 Tablespoons fresh shredded Parmesan cheese

1/8 teaspoon ancho chile pepper

1/8 teaspoon garlic salt

1/8 teaspoon sea salt

1/8 teaspoon freshly ground black pepper

1/3 cup shredded mozzarella cheese


Instructions

1. Preheat oven to 350 degrees F.

2. Lightly mist (regular-sized) muffin pan with non-stick spray. Set aside.

3. Pop open french bread from can. Place the bread on a cutting board and slice into 1-inch thick pieces. (A sharp knife works best for getting through the dough.)

4. Place each piece in a muffin cup and using your fingers, press it down firmly- covering the bottom and along the side of the muffin cup (it doesn't have to go all the way up).

5. In a pan, heat up your olive oil over medium heat. Saute your spinach until it's wilted, then add your minced garlic. Once the garlic becomes fragrant, turn off the heat.

6. In a large mixing bowl, combine your softened cream cheese, sour cream, cooked spinach and garlic, Parmesan cheese, ancho chili powder, garlic salt, salt and pepper. Mix thoroughly so that all ingredients are combined and there are no cream cheese lumps.

7. Spoon about 1.5-2 tablespoons of dip onto the bread bowls. Top with a sprinkle of shredded mozzarella cheese.

8. Bake in oven for 13-17 minutes (start with 13 minutes if your oven tends to like to burn things like the one at Mr.S.'s house does). When the edges start to turn a golden brown color, remove pan from oven and set aside to cool for about 5 minutes.

9. Pop the spinach dip bread bowls out from the muffin pan (I gently slid a knife under them to help nudge them out) and serve while still hot.


Monday, July 9, 2012

(Beer Battered) Goat Cheese Stuffed Squash Blossoms


Happy Monday! Surprisingly, I haven't been doing much cooking for the past week, just enjoying the holidays and the weekend. With 4th of July being midweek, it felt like there were two weekends to me. Did you do anything fun for the 4th? Mr.S., the kidlets and I attended a block party at his cousin's in East Sac, complete with taco truck then afterwards went home to light a huge pile of fireworks with another cousin that was visiting from Louisiana. It was a blast but I'll admit I'm one of those grade-A worriers when it comes to fireworks...in fact, I probably am a lot like the mom in Christmas story who keeps saying, "You'll shoot your eye out!!" except I'm constantly harping, "You'll blow your eye out!" or "Watch those fingers!" What a buzzkill, I know...but don't worry, Mr.S. more than makes up for my incessant warnings. He LOVES to light stuff on fire, it's that pyro gene that most boys (and men) seem to possess. He's not as obsessed as his neighbor a few blocks away though, who was lighting gigantic fireworks. I'm not sure where he got them but his fireworks show lit up the whole neighborhood's sky and could seriously put Cal Expo to shame. It was so pretty!

The kidlets lighting some fireworks

When Saturday rolled around we decided to pack the kidlets up along with a picnic and head to the beach. The weather was nice and cool by the coast and we had a fun time frolicking in the waves. No one wanted to come home since we heard that Sacramento was a stinky hot 101 degrees. Gah!

Sunday buzzed by for me- farmers' market and a mimosa brunch with a fantabulous friend and then off to a birthday BBQ for Mr.S.'s big bro. The BBQ was quite enjoyable (tri-tip, panzanella and pasta salads, grilled asparagus and a decadent red velvet birthday cake). If it hadn't been for a horrendous migraine that snuck up on me halfway through the festivities, I would have said it was an A+ Sunday.

So I'm back to the regular week with no BBQs, taco trucks or birthday cake...I'm going to have to cook my own meals today. When my friend Cate and I were at the farmers' market yesterday, squash blossoms were everywhere and cheap! I guess edible flowers are the rage? I picked up a dozen for $2. 

Now I've cooked with squash blossoms before and know that they get wilty pretty quick; so I knew I needed to cook them ASAP. Hmmm...quesadillas? Soup? No, no...wait! Stuffed squash blossoms! I made these last year- stuffed them with goat cheese and then deep fried them in a light beer batter. Mmm, they were delicious and definitely worth another go round. At this point you're probably thinking, "Cheese? Beer batter? Frying? Is this girl loco? It all sounds so heavy!" I assure you it's not, the end result is a delicate savory dish with a delightful melding of flavors.


(Beer Battered) Goat Cheese Stuffed Squash Blossoms

Ingredients

12 squash blossoms
canola or vegetable oil, for deep frying
6 oz. goat cheese (bring it to room temp so it's easier to work with)
2 tablespoons thinly sliced scallions
2 tablespoons fresh herbs (sage, parsley, thyme, oregano, basil- use whatever you like...)
1/2 cup beer (stay away from using a super heavy beer like a port of stout)
1/4 cup flour
1/4 cup corn starch
1/2 teaspoon baking powder
1 large egg, beaten
sea salt and freshly ground pepper

Instructions

1. Gently wash the squash blossoms and allow to dry. Cut off stems and pinch off the stamen.

2. In a mixing bowl, combine: goat cheese, scallions, fresh herbs. Season to taste with salt and pepper.

3. In another bowl, mix batter ingredients together: beer, flour, corn starch, baking powder and egg.

4. Stuff each squash blossom with a tablespoon of the cheese mixture. You can use your fingers and a spoon to do this or you can pipe it in there with a pastry bag. Twist the top of the blossoms to close.


Stuffed

5. Heat oil in heavy-bottomed pan or pot over medium.

6. Once the oil is hot (you want it to be about 375 degrees F), lightly dredge the stuffed blossoms through the beer batter (coating it evenly) and place in pan. Take care not to crowd the blossoms in the pan.

7. Cook until batter takes on a light, golden brown color- about 2-3 minutes on each side. Transfer blossoms to a paper towel to drain for a few minutes.

8. Sprinkle lightly with salt. Eat while they're still warm.

Fried

Tuesday, June 26, 2012

Potato & Chorizo Empanadas


Yesterday, I blogged about attending the Avett Brothers concert on Sunday night and it got me thinking about how I love to listen to music while I'm cooking. Am I alone in this or do you like to have some tunes going while you bustle about in the kitchen? Oftentimes I just put my iPhone on shuffle, dock it to the speaker system and just listen to whatever comes up in the rotation but if I'm doing a lot of cooking I like to listen to my playlists...yes, I have "cooking playlists." They're just bands/songs I like to listen to while prepping, cooking and cleaning. Lately I've been listening to Mumford & Sons, We Are Augustines and Middle East while puttering in the kitchen. Pretty mellow. What have you been listening to?

These potato and chorizo empanadas, however, required me to put on some Gaslight Anthem to make the monotonous task of filling, folding and crimping go a little faster. The empanadas turned out flaky, spicy and delicious! We even had some filling leftover, so we mixed it with some egg for breakfast the next morning. 2-meals-in-one. Gotta love it!


Potato & Chorizo Empanadas (inspired by Red Shallot Kitchen)

Ingredients

3 white potatoes, peeled and cubed
2 pkg. (17.3 ounces each) Pepperidge Farm puff pastry sheets (4 sheets), thawed
1 lb Mexican chorizo, casing removed (longaniza or Soyrizo can be substituted)
1 tbsp canola oil
1 onion, chopped
4 cloves of garlic, minced
1 tsp dried oregano
1/2 tsp cumin
1/2 tsp turmeric powder
1 egg
salt and pepper to taste

Instructions

1. Thaw puff pastry.

2. Preheat oven to 375 degrees F.

3. Heat a large skillet over medium-high heat. Add canola oil, chopped onion and minced garlic into the pan, cook until fragrant. Add potatoes and cook until they are tender.

4. Add chorizo. Cook for another 5 minutes, until it's well browned.

5. Reduce the heat  and add seasonings, stir well. Cook for another 4-5 minutes and then remove pan from heat.

6. The puff pastry dough should be chilly when you start. Open it up/unfold it on a lightly floured surface. Place a large piece of Saran Wrap over the dough and use your rolling pin to roll it out to.

7. Remove Saran Wrap. Using a drinking glass or biscuit cutter, cut out your 2 1/2-inch pastry rounds.

8. Place a small bit of filling on each pastry round. Enough to make a small mound but not so much that it's spilling out. Brush the edges of the pastry with water, fold the pastry over the filling and crimp with a fork to seal. 

9. In a small bowl, mix the egg with one tablespoon of water. Mix well. Using a pastry brush, brush the tops of the empanadas with the egg wash. This will give the empanadas a nice golden color.

10. Slice a small vent on the top of each empanada so that the steam has a way to escape.

11. Place the empanadas on a Silpat. Bake for 14-16 minutes or until golden.

Thursday, June 14, 2012

Crisp Green Apple Salsa


Triple digits! Can you believe it? That's the rumor for what this weekend's temp is supposed to hit. That's Africa hot! Tarzan couldn't take that kind of hot. Jeebus, it's only been in the low 90's this week and I'm feeling hot and cranky. Well come this weekend, if you're feeling knackered and sweaty and don't want to turn on your oven then try making some of this crisp green apple salsa. It's crunchy, healthy and absolutely delicious and best of all it requires minimal effort. You can pair it with some pita or sweet potato chips and take it to a BBQ or just enjoy it solo in front of the air conditioning. (I won't tell, I promise!)

Crisp Green Apple Tomato (slightly adapted from How Sweet It Is)

Ingredients

2 Granny Smith apples- peeled, cored and chopped

1 yellow bell pepper- chopped

1 saladette tomato- chopped

1/4 medium sweet onion- chopped

1/2 teaspoon salt

1/4 teaspoon sugar

3 tablespoons fresh lime juice


Instructions

1. Chop/dice all of the fruits and veggies. (Note: You can opt to not peel the apples if the skin doesn't bother you.) Place in a large bowl.

2.  Add salt, sugar and lime juice. Toss thoroughly.

3. If it's too tart for you, you can add a pinch more of sugar.

4. You're done. Told you this was a quickie. Enjoy!


Friday, May 25, 2012

Pickled Grapes


Oh cheese, glorious cheese...yum! Did you guys see that ALL CHEESE wedding cake on Cup of Jo this week? My gawd! My jaw dropped ---does it get any better than that? Well it can. Even cheese needs a sidekick. Batman had Robin, Cousin Larry had Balki and Ren had Stimpy...so what should your cheese's wingman be?  I vote for pickled grapes. Seriously, pickled grapes. They're delish. I ran across the recipe in Molly Wizenberg's book, "A Homemade Life," a few years back and these little orbs pickled with cinnamon and black pepper will rock your tastebuds. This last batch, I used some leftover muscat grapes and paired the finished product with some creamy Cypress Grove Purple Haze chevre---total foodgasm!


Molly Wizenberg also writes the food blog, "Orangette" which I love.


Pickled Grapes (adapted from "A Homemade Life" by Molly Wizenberg)

Ingredients

1 lb. seedless red or black grapes (I used muscat grapes and it came out fine.)

1 cup white wine vinegar (Make sure you're using the right kind of vinegar, please. It makes a big difference.)

1 cup granulated sugar

1 1/2 teaspoons brown mustard seeds

1 teaspoon whole black peppercorns

1 (2 1/2 inch) cinnamon stick

1/4 teaspoon salt


Ingredients

1. Wash and dry the grapes. Take a sharp knife and poke a slit where the grape's "bellybutton" is. This will help the pickling juices get in there. Place the cut grapes in a large bowl.

2. In a medium pot, mix the white wine vinegar, sugar, brown mustard seeds, peppercorns, cinnamon stick and salt together. Stir the ingredients up to make sure they're combined. Bring it to a nice boil. Give it one last stir, remove from heat and pour over the grapes.

3. Allow the mixture to cool to room temp and then ladle into clean jars with lids. Place the jars in the fridge and allow them to sit overnight.

4. Serve the grapes cold with your favorite cheese.

* The pickled grapes will keep for a week to a week and a half; however, the flavor will become more pronounced the longer it sits.

Sunday, May 6, 2012

Super Smooth Thai Basil Hummus


Happy Sunday! What a weekend- there were all kinds of things going on in town...concerts in the Park started Friday night, there was Derby Days to celebrate and Cinco de Mayo to toast to. So if you're too pooped to do any heavy duty cooking today but need some sustenance, try throwing together this thai basil hummus. The cannellini beans give it a wonderfully smooth texture and the peanut butter adds a bit of nutty flavor...perfect for spreading on some raw veggies or toasted pita. It's a nice change from the boring old chickpea hummus.


Thai Basil Hummus (inspired by 28 Cooks)

Ingredients

2 (15 oz.) cans of cannellini beans, drained and rinsed

2 tablespoons of smooth peanut butter

2 tablespoons grapeseed oil

3 fresh cloves of garlic, sliced

juice of 2 limes

1/4 cup of thai basil leaves, chopped

1/4 teaspoon cayenne pepper

salt and pepper to taste


Instructions

- Combine cannellini beans, peanut butter, grapeseed oil, lime juice and garlic in food processor. Pulse several times.

- Add in thai basil. pepper, salt and cayenne. Process until smooth.

- Taste and adjust seasonings if needed.

- Cover and chill in fridge for about an hour.

- Serve with your favorite accompaniment.

Monday, April 23, 2012

David Chang's Pickled Shiitakes


Can you believe it's Monday already? And how HOT it was this weekend? Hope you survived. I know the AC was turned on over here. This weekend really seemed to whiz by. Mr. S. didn't have the kidlets this weekend so we got some stuff done around his casa and around my cottage. On Saturday, we planted some of these cute Japanese boxwood bushes in front of my cottage, they're called, "Green Beauty." Aren't they gorgeous? I love how the green color just pops against the black bark.


Later that day we attended a birthday party for our friend Brian up in El Dorado Hills that his awesome wife Heather threw. It had a casino theme (she went all out and rented tables and hired dealers), it was a lot of fun. I love theme parties, especially if there's no costumes involved. (If you know me, then you know my intense dislike for having to dress up in costumes.) Sunday was all about BBQing- juicy burgers and fresh veggies. Today though, I thought I'd make another batch of these pickled shiitakes from David Chang's Momofuku cookbook. I made some several weeks ago but quickly scarfed all three jars down. If you like salty stuff over sweet, like I do then you'll positively adore these. Also, you don't have to wait to eat these, they're ready for munching immediately.


Pickled Shiitakes (adapted from Momofuku by David Chang & Peter Meehan)
(makes about a quarts worth)

Ingredients

4 loosely packed cups of dried shiitakes

1 cup sugar

1 cup usukuchi*

1 cup sherry vinegar

Two 3-inch knobs of fresh ginger peeled


Instructions

1. Soak the dried shiitakes in boiling water for about 15-20 minutes. Take the shiitakes out and set them aside. Put the leftover liquid through a fine-mesh strainer to remove any debris. Reserve 2 cups for the recipe. You can discard the rest or save it for other recipes (I like to use it as a base in recipes such as mushroom risotto).

2. Remove and discard the stems from the shiitakes. Slice the caps into strips.

3. In a pot, combine the steeping liquid, the sugar, the usukuchi, sherry vinegar, ginger and the sliced shittake caps. Place the pot on the stove over medium heat and bring to a nice simmer, for 30 minutes. Stir occassionally.

4. At 30 minutes, turn the heat off and allow the mixture to cool. Discard the ginger and pack the shiitakes (really get them in there) into the jars. Top off with the liquid (just enough to make sure the mushrooms are covered).

5. Keep refrigerated. Will be good for 1 month.

* Oto's Market on Freeport sells usukuchi.

 
Fashion Trend © 2011 | All Rights Reserved | About | Privacy Policy | Contact | Sitemap