Showing posts with label recipe. Show all posts

Thursday, September 12, 2013

Ingredient Spotlight: Maxixe


Lately all this Farm to Fork marketing hubbub seems to be steadily driving up the pricing at my homebase farmers' market (the Sunday one at W and 8th). $5 for a small handful of blueberries? $6 for a basket of figs? Are you kidding me?! Your killin' me Smalls! In fact, a friend just told me this week that she can't afford to shop at the Oak Park farmers' market anymore- it's gotten too rich for her pocketbook! So to keep my wallet from feeling the sting but to still eat healthy, I've been driving out to the farmers' market on Thursday mornings on Florin Road were I can still get the reasonable prices on my fresh, local produce that I've grown accustom to over the years. Many of the vendors at Florin are the same ones that are there on Sunday at W Street with the same stock, just lower prices.

On a recent visit, I was intrigued by these spiky grenade-looking veggies with a rat tail. The vendor described them as being a cucumber and gave me a taste. He used a knife to carve off the outer skin of the "grenade" and told me the flesh was edible- seeds and all. He was right, the taste had some similarity to a cucumber, maybe a little less watery and it had a very slight citrus undertone. I bought a dozen for $1. I figured if I couldn't find a recipe to use it in, the kidlets could use them as weapons, Battle Royale-style.

When I got home, I researched my purchase and it turned out, my new spiny veggie buddy is actually called a maxixe. Maxixes originated in Africa and were brought to Brazil during the slave trade.  These days, they're quite popular in Northeastern Brazil and in the Caribbean. (In the Caribbean they're called the Burr Gherkin.) Most of my research turned up that the maxixe was best enjoyed cooked- mainly in stews or sautéed. Neither sounded very appetizing to me. So I decided to use it in making some Japanese style cucumber salad. It came out pretty good. Kind of a pain in the butt to peel but quite tasty and refreshing.

Maxixe Salad

Ingredients

8-9 maxixes washed, peeled and sliced paper thin
1/4 cup rice vinegar
1 teaspoon white sugar
1/4 teaspoon salt
1 1/2 tablespoons sesame seeds, toasted
 
Instructions
 
1. Using a knife, remove the spiky outer skin layer of your maxixe. Then slice each maxixe into in half lengthwise; scrape the seeds out. Using a sharp knife, cut into very thin slices.
 
2. Gently press the maxixe slices in between 2 pieces of paper towel to get excess water out.
 
3. In a bowl, combine  together rice vinegar, sugar and salt. Mix together well and make sure everything dissolves. Add maxixe. Toss. Sprinkle toasted sesame seeds. Serve.

Wednesday, September 11, 2013

Shady Lady Tomato Sauce


Shady Lady tomatoes...they're like the sexy, busty sirens of the farmers' market. With their deep lipstick red color and voluptuous shape, how can you resist them? You can eat them sliced on a plate with some buffalo mozzarella with a good balsamic drizzle or stacked with a thick cut of smoky applewood bacon and some creamy avocado on a fresh, hearty slice of sourdough. There's so many delicious ways to enjoy this heavenly fruit. One of my favorite ways to consume Shady Lady tomatoes is to oven-roast them and then make them into a sauce. The sauce is rich in flavor and smooth like butta', much too good to plop on a bowl of ordinary pasta. I like to use it to dress up appetizers like crostini or mini meatballs. With this batch, I used it to sauce some eggplant parmesan bites I made for some patio dining. We grew some wonderful Japanese eggplants in our garden this summer at Mr. S.'s which I sliced up into rounds. I dipped the round in egg yolk, then tossed them in a mixture of Parmesan cheese and dried breadcrumbs and fried them in some olive oil until they were nice and crisp. (I then placed them on some paper to absorb the excess oil.) Next, I spooned a tablespoon of my Shady Lady tomato sauce on the round and sprinkled some Parmesan on top and served the eggplant bite hot. They were a hit! Next year we'll have to grow more eggplants.

Our Japanese eggplants in the garden when they were about 1/4 of the way grown- don't they look like X-mas ornaments?


Shady Lady Tomato Sauce

Ingredients

5-6 big Shady Lady Tomatoes ( peeled*, cored, seeded, halved)

5-6 garlic cloves, minced

2 small yellow onions, sliced

3 tablespoons olive oil

glug of dry, red wine

2 teaspoons sugar (optional)

1/2 teaspoon sea salt

1 bay leaf

handful of fresh basil, chopped

1 tablespoon good-quality balsamic vinegar

1 teaspoon fresh ground pepper


Instructions

1. Preheat oven to 425 degrees F.

2. Place tomato, garlic and onion in a glass baking dish. Spread out in a single layer, don't crowd. You want them to roast, not steam. Drizzle with olive oil. Roast for 20-30 minutes until they start to caramelize (slightly browned and shriveled).

3. Place roasted tomatoes, garlic, onions in a food processor and give it a few good pulses. Place in a medium-size pot over medium heat. Add wine, sugar, sea salt, bay leaf, and fresh basil. Add a splash of good quality balsamic vinegar. Allow to simmer for 20-25 minutes. Remove bay leaf.

4. Taste. Season with fresh ground pepper. Adjust seasonings if needed.

Marcella Hazan writes in The Essentials of Classic Italian Cooking: "No other preparation is more successful in delivering the prodigious satisfactions of Italian cooking than a competently executed sauce with tomatoes."
 

* The easiest way to peel a tomato is to :

1) Slice a shallow "X" on the bottom of the tomato. Then submerge the tomato in boiling water for 20-30 seconds. Remove and plunge in an ice bath for 30-45 seconds. Remove from the ice bath. The skin should peel off.

OR

2) Freeze the tomato. Remove the tomato from the freezer and let it thaw. Once thawed the skin should slip right off the tomato.


Sunday, September 8, 2013

Asari No Sakamushi


One of my favorite childhood foods was clams- pretty much in any form but fried. When we were living at Yokota Air Force Base outside of Tokyo, my parents would take me to this small Japanese restaurant where I would eat bowl after bowl of miso soup laden with teeny-tiny clams the size of a nickel called shijimi. I see miso soup with clams on menus here in California but never with the wee clams that I had in Japan, instead a bigger, slightly briny clam called an asari (Manila clam) is used. On a trip back to Japan a few years back, my friend Mayumi, took me to the Tsukiji market at the crack of dawn and lo and behold they had my clams...the tiny ones! We bought a big bag...the fishmonger even gave us the "bijin discount" (the pretty girl discount) and Mayumi's grandma was kind enough to cook the clams for us for dinner. It's crazy how little things like that can bring you such happiness.

Even though, I can't get my hands on the itty-bitty shijimi clams here I do get some pretty small clams at Sunh Fish and at Oto's from time to time to make asari miso soup with. If I'm feeling particular grown up, I'll make asari no sakamushi (Manila clams steamed in sake). You usually can find this dish served in izakayas (Japanese pubs). The dish requires very few ingredients and minimal work. Mr.S. isn't too crazy about it...he tends to like his mollusks immersed in butter and garlic but the simplicity of the dish suits me just fine especially on nights when I don't want to spend too much time fussing in the kitchen. A bowl of asari no sakamushi, a glass of white wine and I'm set.


Asari No Sakamushi

Ingredients

2 lbs. asari (Manila clams), scrubbed well
sea salt
1 cup sake ( I used Sho Chiku Bai)
4 tablespoons mirin
1 cup water
2-3 scallions, thinly sliced (white and light green parts)

Instructions

1. Place clams in a colander or a wire sieve. In a large bowl, add one tablespoon of sea salt and fill with cold water. Submerge the colander of clams into the salty water. (Make sure all the clams are covered with the salty water.) Leave in a cool place at least two hours (or up to overnight). The clams will spit out the sand and the sand should fall to the bottom of the bowl. Sometimes if there seems to be a lot of sand, halfway through I'll change out the salted water.

2. Drain the clams and rinse them well. Sometimes if they look a little bit janky, I'll use my scrub brush on them at this point. Throw away any clams that don't close.

3. In a large, deep pan- combine the sake, mirin, and water. Bring to a boil then reduce to a simmer. Add the clams. Cover the pan.

4. Give the pan a good shake every so often. Cook, roughly 4-5 minutes, until shells open.

5. Discard any clams that refuse to open. You do not want to eat those.

6. Garnish with scallions.

* If you want to add a little more kick, sprinkle some togarashi on the finished product.

Friday, September 6, 2013

Seckel Pear-Walnut Bread


Did you know the California Pear Advisory Board is the first California commodity board to sponsor Sacramento's Farm-to-Fork program? To celebrate, many area restaurants like Hawks, Broderick and Michelangelo's will be featuring an appetizer or a drink highlighting the pear during the months of September and October. For more info check out: Farm to Fork-Cal Pear

In my own household and at Mr.S's, we've been eating a lot of pears as well (like in that delicious Blue Heaven Pear Tart I posted about recently). Pears are quite nutritious- they're low in calories, high in fiber and contain no fat or sodium. Most recently, I purchased a bunch of Seckel pears grown by Stillwater Orchards in Courtland. Seckel pears are little itty-bitty pears that are so cute that you almost don't want to eat them. These petite, chubby pears are an olive green color with a maroonish blush. They don't change color when they become ripe, they just get soft around the stem. They also have a delicate sweetness which makes them perfect for pairing with cheese.
 
Currently, I've been enamored with Nancie McDermott's cookbook, "Southern Cakes," which I checked out from my local library. The book is filled with all kinds of irresistible sounding sweets and delectable treats. One recipe in particular caught my eye- Cornelia Walker Bailey's Pear Bread.


I used my Seckels in this recipe and it came out perfect. Since the recipe makes two loaves I shared with friends and I received several compliments on the end product. The pear bread is moist, sweet and nutty- the trinity of perfection for a quick bread. According to my buddy Dave, this bread also tastes quite good when you're drunk. ;-)


Cornelia Walker Bailey's Pear Bread

Ingredients
  • 3 cups AP flour
  • 1 teaspoon baking soda
  • 1/4 teaspoon baking powder
  • 1 teaspoon salt
  • 1 tablespoon ground cinnamon
  • 1 cup chopped walnuts
  • 3/4 cup ( 1 1/2 sticks) unsalted butter, softened
  • 3 large eggs, lightly beaten
  • 2 cups granulated sugar
  • 2 cups peeled and finely grated ripe but firm pears (Seckels, if you can find them)
  • 2 teaspoons vanilla extract


Instructions

 
  • Heat the oven to 350° F. Lightly grease and flour two 9″x 5″loaf pans.
  • Combine flour, baking soda, baking powder, salt, and cinnamon in a large bowl. Scoop out about 1/4 cup of this mixture and combine it with nuts to coat. Stir the coated nuts back into the flour mixture.
  • In a separate bowl, combine butter, eggs, sugar, grated pears, and vanilla. Mix it well then add the this mixture to the flour mixture, stirring just until the flour disappears and the batter is evenly moistened.
  • Pour the batter into the prepared pans. Bake for 60-70 minutes, or until the bread is browned and firm on top. A knife inserted into the center should come out clean.
  • Cool in pan on a wire rack for 10 minutes. Then, remove from pan and place top side up on a plate or wire rack to cool completely.


Tuesday, September 3, 2013

Pink Pearl Apple Salad with Fresh Apple Cider Vinaigrette


Last night, Mr.S. and I introduced Kidlet #1 to the iconic 80's flick, "The Breakfast Club." Although some scenes and references needed explaining (the movie was made in 1985 after all), Kidlet #1 seemed to really enjoy it. That's one of the things I just adore about that kid. He's so open to new ideas, activities and people. I wish more adults were like that. Another amazing thing about him is that he's open to trying new foods. He's always a joy to take out or cook for. Sure, he likes the teen staples of burgers, tacos and pizza but he's just as willing to delve into some sushi, Thai or Greek food.

Recently I brought over a few Pink Pearl apples for the kidlets to try. Kidlet #2 looked at the fruit with the utmost suspicion whereas Kidlet #1 snaked a taste as soon as I sliced it up. If you've never seen a Pink Pearl apple before, pop by the Co-op and pick one up. They currently have a huge display of the heirloom apples from Rider and Sons out of Watsonville. The peel is smooth and cream colored, oftentimes with a blush but the wow factor is that the flesh is a striking rose-pink. The only drawback with these beauties? The season is short, usually just a few weeks.

*An interesting tidbit- Pink Pearl apples were developed right here in Northern California in 1944, by a gentleman named Albert Etter, from a variety called Surprise.

To showcase these pomaceous lovelies, I decided to keep the recipe uncomplicated. I offered them up on a bed of simple mixed greens, sprinkled with honey almond slices and a few drizzles of homemade apple cider vinaigrette. The salad was a hit, Kidlet #2 had two HUGE servings.


Fresh Apple Cider Vinaigrette

Ingredients

2 teaspoons honey

1.5 teaspoons Dijon mustard

a good sized pinch of Kosher salt

a good sized pinch of fresh ground back pepper

1 tablespoon minced shallots

2/3 cup olive oil

1/3 cup apple cider vinegar

1 small glass jar with a tight-fitting lid


Instructions

1. Add all the ingredients to your jar, close the lid.

2. Shake well. You want the oil to incorporate and the mixture to emulsify.

3. Slowly pour on salad.

*vinaigrette will keep for a day or two, refrigerated. Just bring to room temperature to use.

Tuesday, August 27, 2013

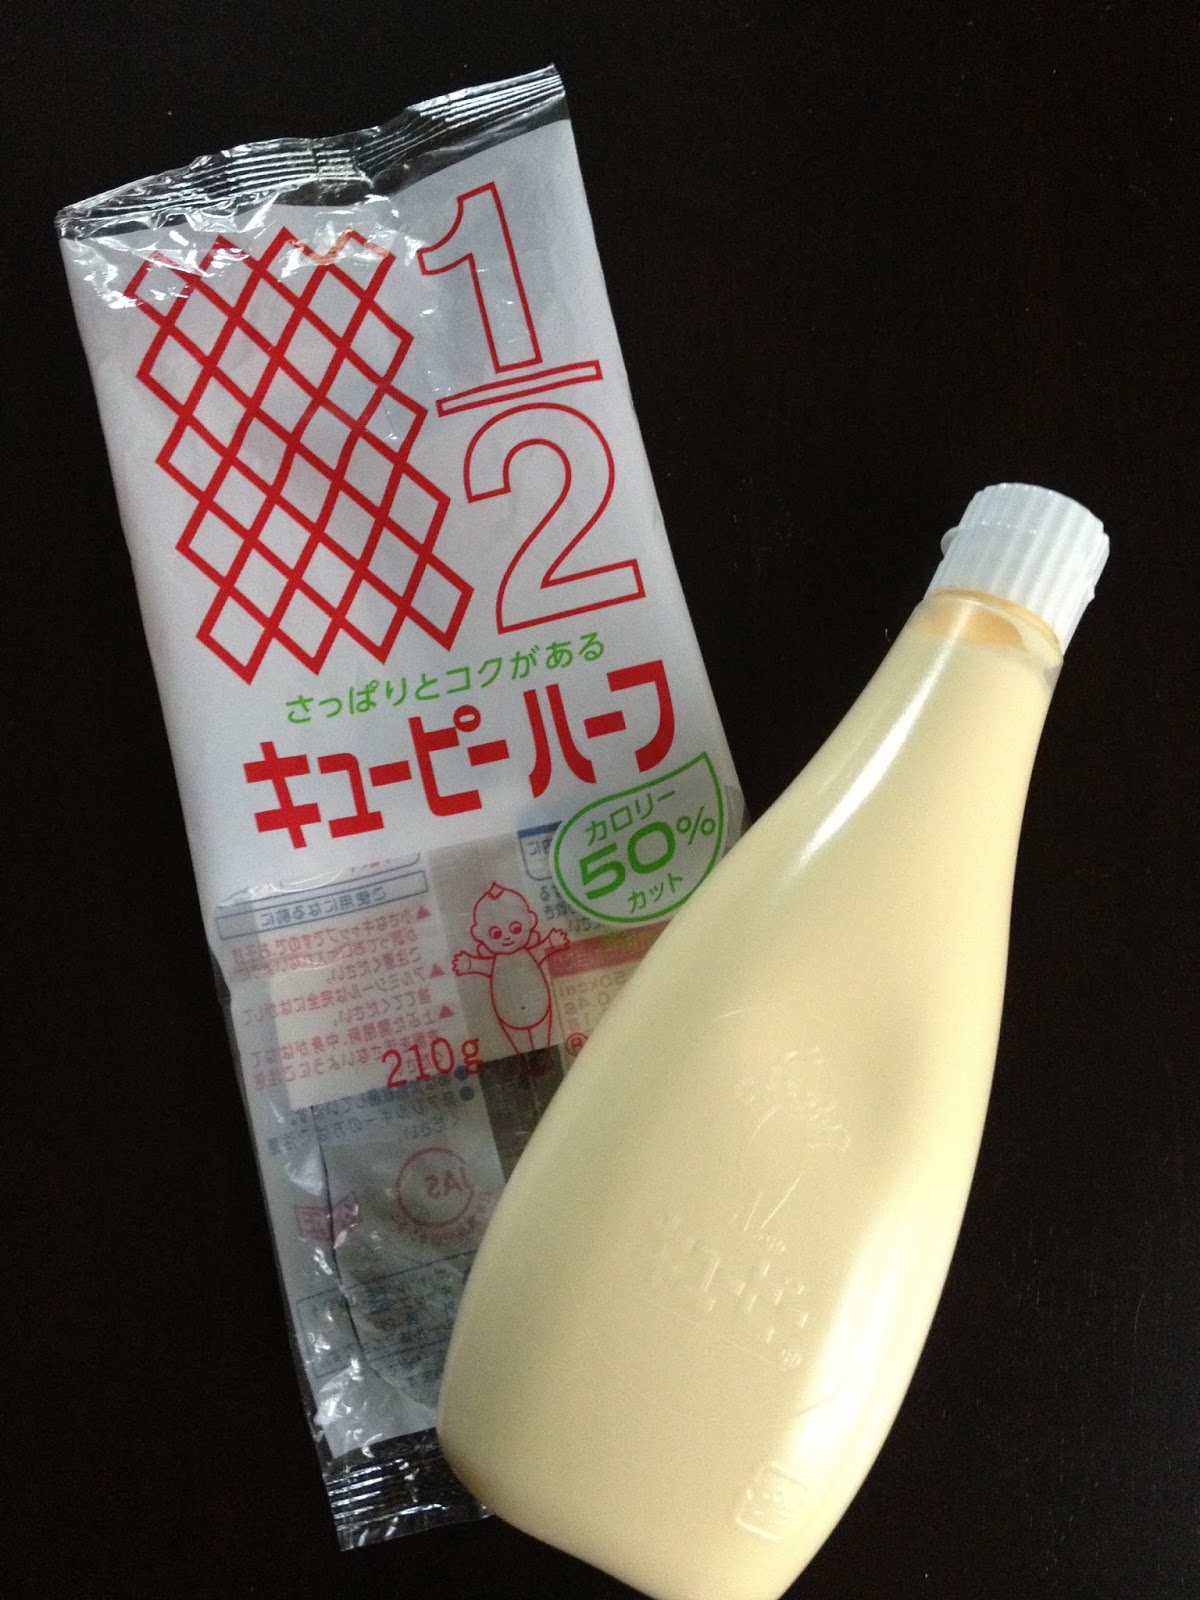
Ingredient Spotlight: Kewpie (Creamy Shrimp and Avocado Salad)


I'm not much of a mayo girl. Usually if a recipe calls for a hefty dose of mayo, I'll sub in Greek yogurt. I never, ever go the Miracle Whip route- that stuff tastes vile. Anyhow, once in awhile I'll get a hankering for seafood salad- you know the goopy, white stuff with chunks of veggies, shrimp and crab? When I do, I opt to make it with Kewpie. Kewpie mayonnaise is a Japanese mayo that's been around since the mid 1920's. It comes in this weird squishy bottle (that kind of reminds me of a colostomy bag) with a creepy, open-armed, naked baby as its logo. Despite the odd packaging, I've been eating the stuff for years. My mom used to make Japanese potato salad with it when I was a kid (in fact I nowadays I still prefer my potato salad with Kewpie over the standard mayo). To me Kewpie has a much smoother, creamier texture than Best Foods or Kraft and tastes less eggy (they use twice the amount of egg yolks). Also it's made from rice vinegar as opposed to distilled vinegar, so it imparts a slightly sweeter taste. Kewpie also has a bit of umami to it, making it great for incorporating it into a variety of dishes. I've used it in deviled eggs, in oyster motoyaki and drizzled on okonomiyaki.   If you like mayo with your artichoke, asparagus or French fries, try switching it out for Kewpie. You won't go back. Additionally, if you mix it with sriracha, it makes a fantastic spicy dipping sauce.


Creamy Shrimp and Avocado Salad

Ingredients

1/2 lb. of cooked, medium-sized shrimp

5-6 cherry tomatoes, sliced in half (optional. I skip this sometimes as Mr. S. is not a raw tomato fan)

1 firm but ripe avocado, chopped into small cubes

1/4 cup chopped red onion

1/3 cup Kewpie mayonnaise

1 teaspoon lime juice

1 teaspoon sriracha

1 garlic clove, finely minced

1 teaspoon of shio-koji (or sub in a pinch of salt)

fresh ground pepper, to taste


Instructions

1. Slice cooked shrimp into small bite-sized pieces. Place in a medium-sized bowl. Combine with cherry tomatoes, avocado and red onion.

2. In a small bowl, whisk together Kewpie, lime juice, sriracha, garlic, shio-koji and pepper.

3. Pour dressing over shrimp mixture. Gently toss together.

4. Give the flavors a chance to meld together (I throw it in the fridge for a half hour).

5. Keep refrigerated until ready to serve.

Makes 2 servings

* If you're in Sacramento, Oto's sells Kewpie.


Sunday, August 25, 2013

Small Batch Honey-Fig Jam


If you're one of the lucky ones who has ready access to a flourishing fig tree, I'm sure you're up to your eyeballs in sweet, ripe figs right about now. One easy way to use up some of your bounty is to make some fig jam. This is a super easy recipe that utilizes honey instead of sugar. I just made a batch this week with a bag of plump Mission figs my friend Dawn gave me and some local honey I buy from another friend, Neal. Since it was a small batch I skipped water bathing the jam and just popped it in the fridge. It'll keep there for about a month, but I'm sure it'll get eaten up much sooner than that. Plopped on some Greek yogurt, spread on some fresh-baked bread or accompanying a simple cheese platter...mmm...I'm getting hungry just thinking about the uses!


Small Batch Honey-Fig Jam

Ingredients

2 pounds fresh figs, cut into quarters

1.5 cups good quality honey (go for the lighter color honey, so that it won't overwhelm the flavor of the figs)

6 tablespoons of water

lemon zest of 1 lemon

4 tablespoons of lemon juice


Instructions

1. Sterilize your half-pint jars in boiling water. Place your lids in a pan of VERY hot (but not boiling) water for at least 5 minutes.

2.  Wash figs and remove stems. (I don't peel them as the skins get quite soft during the cooking process and I like the texture.) Slice figs into quarters.

3. In a large saucepan, combine the figs, honey and water. Let sit (unheated) for about 25-30 minutes.

4. Bring mixture to a boil then reduce heat immediately to a simmer and cook for about 30-40 minutes. Stirring frequently (you don't want the honey to burn). You'll notice that the figs will start to break down and the mixture will thicken. (Optional: If you want smaller bits, you can mash them up a bit with a potato masher at this point.)

5. Add lemon zest and juice. Stir. Cook for another 2-3 minutes.

6. Remove from heat. Ladle into hot-sterilized jars. Place lid on. Allow to cool, place in fridge.

7. Will keep for about a month, refrigerated.


Friday, August 23, 2013

Ingredient Spotlight: Sugar Plums (Sugar Plum Torte)


Ahhh, sugar plums. I always look forward to those tiny plums coming into season but at the same time lament that they signal the end of summer. You start spotting them around the end of July/beginning of August and their availability is short-lived (usually around 3 weeks). This year I decided to purchase some (I got mine at the Co-op, they're from Full Belly Farms I believe) and make Marian Burros' famous Plum Torte. Marian Burros is a cookbook author and a food columnist for The New York Times. Her plum torte recipe has been the most often requested and the most republished recipe in the NYT for twenty years. Crazy, huh? You know it's got to be a pretty good recipe with a track record like that. I think most of you will really like this torte- it's quick to prepare, requires few ingredients and it makes your house smell phenomenal. The cake portion is crusty and airy, the plums sweet and there's a whisper of cinnamon and sugar. You could make this recipe with any old plum; but trust me, if you want to bump up the flavor profile of the torte and truly make it shine, use sugar plums. These bite size plums have a wonderful honey taste that can't be beat. The whole shebang is absolutely delectable but it tastes even more fantastic served warm with a side of vanilla ice cream or topped with some sweetened whipped cream. Best of all (gasp!), this torte freezes well so you can enjoy these juicy, sweet plums in the dead of winter.


Sugar Plum Torte  (New York Times)

Total time: 1 hour 15 minutes

Ingredients

3/4 cup sugar
1/2 cup unsalted butter
1 cup unbleached flour, sifted
1 teaspoon baking powder
Pinch of salt
2 eggs
24 halves pitted sugar plums
Sugar and cinnamon for topping

Instructions

1. Preheat oven to 350 degrees.

2. Cream sugar and butter in a bowl. Add flour, baking powder, salt and eggs, and beat well.

3. Spoon the batter into a spring form of 8, 9 or 10 inches. Place the plum halves skin side up on top of the batter (I didn't, it doesn't really matter). Sprinkle lightly with sugar, depending on the sweetness of the fruit. Sprinkle with about 1 teaspoon of cinnamon, or to taste. (I mixed some sugar and cinnamon together and then sprinkled that across the cake.)

4. Bake for 40 to 50 minutes. Remove and cool; refrigerate or freeze if desired (but first, double-wrap the tortes in foil, place in a plastic bag, and seal). Or cool to lukewarm, and serve.

5. To serve a torte that has been frozen, defrost and reheat it briefly at 300 degrees.

Yield: 8 servings.

Tuesday, August 20, 2013

Day Trip: Lake Anza (Honey-Mint Melon Salad)


Tilden Park website: http://www.ebparks.org/parks/tilden.htm#about

Have you ever gotten sidetracked from a destination and ended up in an even better situation? That happened to us a few weeks ago. During a particularly hot weekend, we decided to take the kidlets to the ocean for the day. We left the house on time but from there the day went askew. We got stuck in traffic (it took us over an hour just to get from Sacramento to past Davis), the kidlets were bickering non-stop in the backseat and Mr.S. was in Defcon 1 grumpy mode. At some point just outside of Berkeley, Mr.S. flipped his lid and threatened to just turn the car around and go home. Everyone was pissy, hungry and sick of being in the car. Not wanting to sit in the car for another hour, I poked some information into the search engine on my phone and pointed out to Mr.S. that we were about ten minutes from a lake in Berkeley. So we went searching for Lake Anza. Honestly, none of us knew what to expect but our derailment turned out to be a nice surprise. After meandering through a billion residential streets and going up a hill, we reached a small lake in what appeared to be a giant park. We later learned that Lake Anza is situated in the heart of Tilden Park, a regional park that that houses an 18 hole championship golf course, a merry-go-round, a miniature steam passenger railway, a tiny farm animal zoo and a gorgeous botanical garden. There's also tons of hiking trails, a picnic area and a campground. All in Berkeley, who knew?! We decided to park our butts down by the lake, eat our lunch and soak up some sunshine. As we ate our sandwiches, we watched a few brave souls jump into the lake (swimming is allowed and there are lifeguards on duty), a team of ducks paddling about and several happy dogs playing fetch (most areas of the park are dog friendly).


Afterwards, we ambled over to the Regional Parks Botanic Garden. We were pretty impressed with how well kept it was and that it was so incredibly peaceful. Even the kidlets quit quarreling and enjoyed the serenity of the nature surrounding them.


I'm thinking, Mr.S. and I might have to make a trip back out to this urban oasis soon, just the two of us for a day trip date. Next time, I'll pack a real picnic lunch- some crusty homemade bread, creamy cheese, fresh fruit preserves and a simple, refreshing melon salad like this one:

Honey-Mint Melon Salad

Ingredients

Melon
Raspberries
Mint (torn into small pieces)
Lime juice
Honey

Instructions

1. Cut up your favorite melon into bite sized chunks.
I used this fantastic melon I purchased at Vierra Farms in West Sac. I think it's called a hami melon? Anyhow, it's an oval, yellow-skinned cantaloupe with green speckles and white veins. The melon itself is crisp and tastes sweet like a honeydew


2. Place the melon pieces in a medium-sized mixing bowl. Add in fresh raspberries and mint. I used some apple mint.


3. Give it a squirt or two of lime juice. (If you want to get fancy, you can sprinkle in some finger lime pearls instead.)

4. Drizzle with honey. Toss. Serve. Voilà! Simple as that.

Sunday, August 18, 2013

Pan-Seared Scallops & Morels in Beurre Blanc


It's that wonderful time of the year...the day most parents count down to (like a kid counts down to Christmas) - THE FIRST DAY OF SCHOOL. Although Mr.S.'s kidlets are great, by the end of summer both our nerves are pretty frayed. This year the kidlets will be attending different schools so they each had a different start date. Kidlet #1's first day of high school was last Monday and Kidlet #2 starts back up this Tuesday at his elementary school. The consensus after the first week from Kidlet #1 was that high school was "pretty cool," especially since he's already made new friends and due to a scheduling glitch he ended up with TWO lunch periods on the first day.

Anyhow, Mr.S. and I thought we'd celebrate this "holiday" by cooking up a tasty treat for ourselves. A celebration of surviving a summer of teen and preteen hormones, sibling rivalry and incessant "I'm bored's" and "He's looking at me's". I picked up some fresh, plump (or as I like to call them- fat ass) scallops at my favorite seafood store, Sunh Fish, along with some morels at the Co-op. I figured these ingredients paired with a simple beurre blanc (a velvety white butter sauce) would make a mind-blowing meal. And guess what? I was right! [I also made a side of sautéed balsamic carrots and beets greens so that we got our veggies in. ☺] The recipe didn't take too long to make, especially since I did my Back-to-School happy dance while whistling to The Final Countdown as I prepared the meal.

By the way, just a heads up-- beurre blanc is not for the faint of heart, it involves a INSANE amount of butter. Don't say I didn't warn you....


Pan-Seared Scallops and Morels in Beurre Blanc

Ingredients

1 dozen fresh, large scallops  (season on both sides with salt and pepper)
6 morels, cleaned of all grit and sliced in half length-wise
1/4 cup dry white wine
1/4  cup champagne vinegar (or white wine vinegar)
1 tablespoon heavy cream
2  tablespoon finely minced shallots
Kosher salt and ground white pepper, to taste
2 sticks cold, unsalted butter (cut into tablespoon-size pieces)
1 tablespoon of clarified butter
1 tablespoon of vegetable oil
6 cherry tomatoes, cut in half
4-5 finger limes (optional)

Instructions

1. In a medium saucepan, bring the wine, champagne vinegar and shallots to a boil.

2. Cook for about 10-12 minutes, until the mixture is reduced to a thick sauce-like consistency.

3. Reduce heat to low and add in the cream. Stir.

4. Add 1 tablespoon of COLD butter at a time. Whisk each piece in thoroughly, making sure it incorporates into the sauce. Keep whisking constantly throughout the whole butter adding process. The sauce should be rich and creamy looking when you're done.

5. Season with salt and pepper.

6.  On a large plate, arrange your tomato halves.

7. In a large cast-iron pan, heat up the clarified butter and vegetable oil over high heat. (You want it smokin' hot.)

8. Place the scallops in the pan. Don't crowd them. Then don't touch them for about 2 minutes. Let them cook undisturbed, you want to get that nice golden-brown crust. At two minutes, flip them over and cook them for another minute or two depending on the thickness of the scallops. (Be sure that you don't overcook them, overcooked scallops taste rubbery and gross.)

9. Remove scallops from heat and place on plate.

10. In the same pan, you just removed the scallops, give your morels a quick sauté. Add another pat of butter if you wish.

11. Place the sautéed morels on the plate. Scoop the beurre blanc over the scallops, morels and tomatoes. Garnish the scallops with finger lime caviar if you wish. Enjoy!

* Note: Beurre blanc does not keep well, so you want to make it right before you use it.

Thursday, August 15, 2013

Ingredient Spotlight: Finger Limes (and Grilled Oyster Recipe)


I've been enamored with finger limes ever since I had them on some fresh oysters and in some phenomenal cocktails last year. I love how the little tiny spherical bubbles feel on my tongue and when you bite into them you get this effervescent burst of lemon-lime flavor with a slight floral undertone. They're kind of like a citrus pop rock.

Now I'll admit at first glance, finger limes are a bit fugly. They look like dried out gherkins (especially the ones with brown or purple peel) or a pudgy ogre finger, but the pulp inside this microcitrus is amazing. When you cut into the finger lime (which by the way isn't even a lime, it's a cousin to the lime), you'll see a bunch of translucent pearls. They can range in color from clear, green or pink. If you give the outside layer a squeeze, the pearl-like pulp will come tumbling out.


Finger limes are quite versatile. You can use them in drinks, marmalades, salads....You can also use the zest. The zest of finger limes is a bit unusual. It's thin and contains isomenthone, which is common in mint but unusual in citrus. My favorite way to use finger limes is to squeeze them onto fresh oysters (raw or grilled). Used as a garnish, the finger lime pearls add a nice kick of tanginess. One of the many cool things about finger limes is that you can freeze them (for 3-6 months). If you do this, you want to place them whole (uncut) on a baking sheet and once frozen, transfer them to an airtight container. When defrosting, defrost in the fridge.

Finger limes are a native bush to Australia so they're a bit hard to find but some farms (like Shanley Farms) in California have started growing them recently in small quantities. I was able to buy a container of them from the kind folks at Produce Express, which caterers to restaurants. So if you're in the restaurant biz you can order directly from them. Otherwise, I've seen finger limes at Whole Foods on occasion.  Or you can grow your own! Four Winds Growers in Winters, CA sells them in 5 gallon size tree form to area retailers.


Grilled Oysters With Butter, Sriracha and Finger Lime "Caviar"

Ingredients

1 dozen fresh oysters (I prefer the large ones for grilling), scrubbed

1/2 stick of unsalted butter, softened

1 teaspoon of Sriracha

1/4 teaspoon sea salt

2 tablespoons of grated Parmesan or Pecorino-Romano (optional)

5-6 finger limes, cut in half


Instructions

1. Heat up your grill so it's VERY hot.

2. In a small bowl, mix up your butter, sriracha and sea salt. Place the bowl in the fridge for a bit to let it firm up.

3. Use an oyster shucker to open up your oysters. Be careful when popping the hinge, the shells are brittle and oftentimes sharp. Please don't slice open your hand.

* If you do not own a shucker or just don't want to shuck, you can place the closed oysters on your hot grill (cupped side on the bottom), with the top closed for 1-2 minutes. The oysters will open up on their own from the heat. Remove them as soon as the open.

4. Place a dollop of the butter-Sriracha mixture on each of your oyster. You can lightly sprinkle some Parmesan on the top too, if you wish. Place the oysters on the grill for 4-5 minutes (3-4 minutes if you popped them on the grill to open them). Use tongs to remove oysters from grate. The shell will be extremely hot.

5. Top with a squeeze of finger lime "caviar." Serve immediately.

Tuesday, August 13, 2013

Blue Heaven-Pear Tart


It's pear season! And what goes best with pears? Cheese, of course! Awhile back, the nice folks at Rogue Creamery in Oregon sent me a shaker of their new Blue Heaven powder to try. Blue Heaven is a project they have been working on for more than ten years and just recently unveiled for Rogue Creamery's 80th Anniversary. Rogue Creamery is most famous for producing award-winning, gourmet blue cheeses so it should be no surprise that Blue Heaven is a blend of their popular Oregon Blue, Oregonzola, Crater Lake Blue and their special reserve blue cheeses. The cheeses are dried and then mixed with nonfat organic milk powder. Why should you try it? Because it tastes great! Blue Heaven is also convenient, shelf stable and made from certified sustainable raw cow's milk. It can be used in all kinds of delicious dishes- to add some zing to your mashed potatoes, to accent your soups or even as a savory seasoning sprinkled on your popcorn. There's all kinds of creative ways you can use Blue Heaven to transform your dishes. I decided to use my complimentary shaker of Blue Heaven in making a pear tart. I had picked up some fresh, juicy Bartlett pears during my excursion to Courtland this weekend and was just itching to make something with them. I used a basic tart shell recipe and made a filling of sliced pears, Blue Heaven and cream cheese. (I wanted the filling to be a bit creamy, hence the cream cheese.) Since pears tend to get tender when baked, I also tossed in some toasted almond slivers to give the tart some added texture and crunch. The Blue Heaven ended up lending a nice mellow blue cheese taste to the tart filling which I liked. It wasn't overwhelming at all.


The end result? My cottage was filled with intoxicating aromas all yesterday afternoon and the Blue Heaven-Pear Tart got an enthusiastic thumbs up all around from my taste testers and one, "Nom! Nom!" The Kidlet even liked it.

Blue Heaven powder can be ordered online via the company's website. It is also available at Laurent Dubois, one of France's finest cheese shops, and Simon Johnson's specialty food stores in Australia, for you international folks.

Website: Rogue Creamery
Facebook: Rogue Creamery
Phone: (866) 396-4704


Blue Heaven-Pear Tart

Ingredients

1/2 cup unsalted butter, softened
2/3 cup granulated sugar
1 cup AP flour
1 package cream cheese, softened
1 large egg
2 fresh Bartlett pears- sliced   (To peel or not to peel- it's your choice.)
3.5 to 4 tablespoons of Rogue Creamery's Blue Heaven powder
2/3 cup + 2 tablespoons almond slivers, toasted
2 tablespoons honey, warmed    (optional)


Instructions

1. Preheat oven to 425 degrees F.

2. In a small pan over medium-high heat, toast your almond slivers. Flip and stir them often. Be sure to keep a close eye on them as they can go from toasted to burnt very quickly.

3. Beat butter and 1/3 cup sugar with mixer until smooth and fluffy. Add flour, continue to mix. Remove dough from mixer bowl and place in a 9-inch quiche pan (a springform pan will also work). I prefer the quiche pan because it gives the tart a more polished look with its crimped edges and the removable bottom makes for easy release and serving. Nordic Ware makes a good one that runs about $11 and comes in a variety of colors.

3. Press the dough onto the bottom of the pan and about 1/2 way up the sides of the pan. Make sure the dough is spread out evenly.

4. Slice your pears and arrange on top of your dough. Sprinkle with 2/3 cups toasted almond slivers.


5. In a mixer bowl, combine the softened cream cheese and 1/3 cup sugar. Make sure the two are completely blended- no lumps. Add your egg and Blue Heaven. Mix well. (If you prefer a more robust blue cheese flavor, you can adjust the intensity by adding more Blue Heaven. At 3.5 tablespoons, my tart had a nice subtle blue cheese taste.)

6. Pour filling over pears. Spread evenly. Top with remaining 2 tablespoons of toasted almond slivers.

7. Bake for 10 minutes. Then reduce to 375 F and bake for additional 20-25 minutes.

8. Allow tart to cool.

9. Slice. Drizzle with warm honey if you wish, before serving.


* I was not compensated for this post other than receiving one complimentary shaker of Blue Heaven powder. All opinions are completely my own and I was under no obligation to write about the product.


Sunday, July 14, 2013

Refreshing Pineapple Gazpacho


Eleven years ago, I got married to my (now ex) husband. The marriage didn't last but we had a wonderful wedding in Hawaii at the Hale Koa Hotel. Now mind you, this was back before destination weddings became über trendy and everybody and their brother started having them there. Anyhow, if you haven't been to the Hale Koa and get the opportunity to check it out, do so. It's a lovely 70+ acre oasis nestled in the western corner of Waikiki. We had the wedding in a lush, tropical garden that backed up to a shimmering sandy beach. I couldn't have asked for a better backdrop for our nuptials. If it's so fantastic, why isn't everyone having their wedding at this particular venue, you ask? Well, the catch with the Hale Koa is that it's a hotel and resort owned by the Department of Defense and only for active duty or retired military and their families. Luckily, my dad's retired military so we were able to hold our wedding at this fab location for much less than all the other swanky places on the island.

One hurdle we encountered though during planning was that the hotel had a strict policy that only they could cater events held on their grounds so we had to let them do the food. What a bummer! Most of it was what you'd expect from a hotel's catering department except two courses which really stood out to me: our passion-guava wedding cake and the pineapple gazpacho (neither of which I think they offer anymore). Now, normally I'm not a fan of gazpacho (mostly because I detest tomatoes) but this chilled soup was so refreshing- an exquisitely balanced medley of sweet and tart with just a slight hint of spiciness...and no tomatoes! It was the perfect opening dish for an island wedding. I loved it! It was fun, it was light, it was tasty! Every summer since, I've always meant to try and replicate that soup but never got around to it. Finally during our recent mini heat wave, I decided to try and recreate it. I made several different recipes I found online and in various cookbooks and then took the ingredients and tastes I liked best to create my own version.

If you're sick of salads, this soup is a nice alternative during the dog days of summer; not to mention, that pineapple has a lot of anti-inflammatory qualities. Gazpacho is a great dish to whip up for parties, you could serve it in shot glasses for cocktail hour or if you want to fancy it up for a sit-down dinner, place it in chilled martini glasses. The best thing though is--it's simple to make and there's no hot stove or oven required.

Refreshing Pineapple Gazpacho

Ingredients

1 pound of pineapple, cut into chunks

1/2 of a large English cucumber, peeled and sliced

1 medium yellow bell pepper, cored and chopped

1/3 cup diced red onion

1-2 scallions (mostly white), thinly sliced

1 jalapeno, seeded and minced

1 1/2 cups of DOLE pineapple-orange juice

3 tablespoons Italian dressing

1 tablespoon seasoned rice vinegar

1 tablespoon fresh lime juice

sea salt and pepper, to taste (optional)


Instructions

1. Place all ingredients in a blender. Cover, blend until relatively smooth.

2. If you would like the soup to have a smoother texture/be thinner, you can put the soup through a chinois or sieve. If you would like it to be thicker, take a slice of crusty peasant bread, soak it in water, squeeze the water out, add it to the gazpacho and blend again.

3. Taste. Season with salt and pepper, if needed.

4. Refrigerate for 2-3 hours so that the flavors have a chance to meld. Serve chilled.

5. Garnish with diced cucumber and bell pepper...or for some crunch, sprinkle with chopped macadamia nuts and some cilantro.

Sunday, June 23, 2013

Spicy Forbidden Rice Salad


Recently while at a farmers' market, I ended up in a friendly conversation with a fellow shopper about Korean melons and kholrabi. At the end of our chat, she remarked that I was so lucky to have learned how to cook from my mom as a child. I get that a lot. People assume if you enjoy cooking you must have been doing it all your life and learned from your momma or granny. I actually learned from neither and oddly enough, until a few years ago I hardly cooked a lick. Now don't get me wrong, I've loved food ALL my life...but my zest for cooking? That started just short of 5 years ago. (Up until then my claim to fame was a half-assed green salad and a rubbery shrimp scampi.) Cooking's not in my blood. Growing up, my mom had about a half a dozen recipes in her repertoire and my dad would burn hot dogs so badly on the grill I would have to peel the charcoaled outer skin off to get to the edible core. These days my mom rarely cooks, maybe a pot of rice here or there and if the mood strikes she may grill some mackerel. My dad sticks to making the one recipe he does best- homemade spaghetti sauce. Neither of my parents would give Ina Garten a run for her money. In fact, they store pots and pans in their oven and dry goods in their dishwasher, that's how often they cook. They did however encourage me to be open-minded and try all kinds of food when I was growing up- from matzo balls to deep-fried chicken gizzards to natto. Although these days I may have surpassed them in my passion for new delicious foods, as they tend to scratch their heads quizzically when I wax on about foie gras, sweetbreads and quinoa during my visits home. As for the cooking part, over the past few years I've taught myself- mostly by experimenting in the kitchen, pouring over recipes and gleaning handy tips from friends who are amazing cooks. So when people tell me they can't cook...I like to point out that they can cook, they just choose not to. They just need to put the time and the effort into learning how to cook. Start with the simple dishes and work your way up...and most importantly- have fun!

One of the things that keeps cooking interesting for me is stumbling upon new and unique ingredients. For example, one of my recent finds at my local grocery store was a mysterious-sounding rice by Lotus Foods called "Forbidden Rice."* The name was just so cool and the color so intriguing, I couldn't resist picking up a small bag to play around with. As it turned out Forbidden Rice is a heirloom short-grain rice with a bit of a nutty taste, chewy texture and an intense inky purple hue (once it's cooked). This Thai black rice is pretty versatile and you could use it in many of the same dishes that you would use wild rice in. Additionally, it's quite the healthy addition to any diet as it's high in antioxidant-rich anthocyanins, iron and is a good source of fiber.  For my first attempt at using it, I wanted to keep it uncomplicated so I opted to make a rice salad. Prowling around the Internet, I found an easy recipe by Charlie Ayers utilizing Forbidden Rice. (Charlie Ayers is the former executive chef for Google.) I liked that it had a spicy dressing, so I used that for my salad and just changed up the ingredients to what I had on hand or preferred. The result was a tasty, eye-catching salad with a bit of a kick.  Now you could also jazz this salad up by adding some chopped sweet potatoes, mandarin slices or even some shelled edamame. Or you could top it with a protein such as a ginger-sesame salmon fillet or some sliced citrus-soy marinated flank steak to make it a full meal.
 
[* Supposedly in ancient China, black rice was reserved only for the emperor/royal family and was not available to the public; hence, the name "Forbidden Rice."]


Spicy Forbidden Rice Salad

Ingredients

1 cup Forbidden Rice

1/4 cup scallions, green & white parts thinly sliced

1/2 cup Sweet Twister pepper, diced

1/2 cup English cucumber, diced

1 cup roasted/unsalted cashews, chopped

2 tablespoons low-sodium soy sauce

2 teaspoons sesame oil

juice of 1 lime

1/2 teaspoon sambal oelek

1/2 teaspoon honey

salt and ground pepper, to taste

1-2 tablespoons toasted sesame seeds


Instructions

1. Put the rice, 2 cups of water and a generous pinch of salt  in a small pot or saucepan and bring to a quick boil. Cover, reduce the heat to low and allow to simmer for about 30 minutes (until liquid is absorbed and the rice is tender).

2. In a small bowl, mix together soy sauce, sesame oil, lime juice, sambal oelek, honey, salt and pepper. Set aside and allow flavors to meld.

3. When the rice is ready, remove from heat. If there is any excess water, drain. Allow to cool.

4. Once cool, place the rice in a large bowl and add green onions, Twister pepper, cucumber and cashews. Mix together thoroughly.

5. Give the dressing a quick whisk then pour over the rice salad. Mix it up really well. Taste. Add more salt, pepper, lime juice, honey or sambal oelek if needed. (If you want it spicier, up the sambal oelek.) Sprinkle with toasted sesame seeds.
 
6. Serve at room temp or chill in fridge.

Monday, June 10, 2013

Muffin Tin Croque Madame


108 degrees! Ugh! I dunno about you all but I was sweating like a pig all weekend. We had a Catholic school graduation to attend Friday night and it was balls hot in the church. They said the AC was on, but I have my doubts. On the bright side, maybe I sweated off a pound or two. Saturday night, I ended up at the Endurocross racing at The Sleeptrain Arena (is that what the name is this week?) with Mr.S. and the kidlets. I know, I know...you all can't picture me at an event like this but I ended up having a good time. Endurocross is a super fast, intense, high endurance sport. It's similar to motocross racing but instead of just speeding around, they race over large rocks, logs, tires and even through a water pit. I especially liked watching Wally Palmer race (unfortunately, he didn't win).


Sunday cooled down considerably, thank god! Mr. S. took me to Green Acres Nursery to buy some veggie plants for the raised garden bed he made for me. How awesome is he? What was really impressive was that he made the whole thing from scratch. I absolutely love it. We planted peppers, cherry tomatoes, Japanese eggplant, cucumbers, basil and squash. Kidlet #1 wanted a watermelon plant so we planted that too. Now if they'd just grow overnight, I'd be a happy camper. (I'm soooo impatient!) Grow! Grow! Grow!


Lately I've been watching Rachel Khoo's show, "Little Paris Kitchen" online. I had checked out her new cookbook from the library recently and found that I liked the simplicity of her French recipes and how she gives each one a neat twist. (Plus she's a hapa like me and cooks in a teeny-tiny kitchen, gotta love that!) This morning I made one of her recipes for breakfast for Mr.S. and the kidlets, the Muffin Tin Croque Madame. The snack-sized savory treat got an enthusiastic thumbs up all around from my favorite little taste testers. I made some small modifications to the recipe to suit my taste but followed the recipe as is for the most part. You can see the original recipe here:  Croque Madame Muffins. By the way, the leftover Mornay sauce is absolutely delicious on a side of grits or as a dipping sauce for biscuits.

"Muffin Tin" Croque Madame

Ingredients

For the Mornay (cheese) sauce:
  • 1 tbsp butter
  • 1 tbsp all-purpose flour
  • 3/4 cup plus 1 tbsp milk, lukewarm (whole or 2%. Skip using nonfat, soy, almond, etc. for this recipe)
  • 1/2 tsp Dijon mustard
  • 1/2 tsp nutmeg
  • 1/4 cup grated Gruyère cheese
  • 3 tbps grated Parmesan cheese
  • salt and pepper
  • 6 large slices of bread, no crusts (I used sliced wheat bread, but you can use whatever suits your fancy)
  • 3 tbsp butter, melted
  • 2 1/2 oz ham, cut into cubes or thin strips or 3-4 strips of bacon chopped into small pieces
  • 6 small eggs
Instructions

1. Preheat oven to 350 degrees F.

2. In a small saucepan, heat 1 tablespoon of butter over medium heat. Add your flour, and beat together until smooth.

3. Gradually add your milk, whisking the entire time. Add your Dijon mustard and nutmeg. Let it all simmer together for about 10 minutes. Give it a whisk every few minutes so it doesn't burn.

4. Add about 90% of your Gruyere and all of your Parmesan. Continue whisking the ingredients. Add salt and pepper to taste.

5. Remove the crust from the bread slices and flatten each slice. You can brush both sides of the bread with melted butter, but I found just doing one side was fine.

6. Spray your 6-cup muffin tin with cooking spray. Press each slice of bread in the muffin hole. You can used the bottom of a drinking glass but I found it just as easy to smoosh it down with my fingers.

9. Place a few pieces of ham or bacon in the bread "cup". Followed by one egg on top (you may have to pour out a little of the egg white before adding the egg, so that it fits). Top with 2 tablespoons of the Mornay sauce. Sprinkle with your leftover Gruyère. Season with some black pepper, if you wish.

10. Place the muffin tin in the oven. And cook for 20 minutes (a few minutes less, if you like your eggs on the runnier side).

11. Remove tin from oven. Use a fork or knife to pop the croque madame out. Serve while hot.

Wednesday, June 5, 2013

Hawaiian Mac Salad


I hadn't planned on doing a post for the Hawaiian Mac Salad that I made on Sunday, but after I posted about the Kalua pig, I got about a dozen emails requesting the recipe for the macaroni salad I made to go with it.

Note, for those who haven't had it before-  Hawaiian Mac Salad is not your normal macaroni salad from the deli counter. It's tangier and sweeter, the mayo is thinned out by milk and its only extra ingredients are grated carrot, sliced scallions and small bits of celery. Also, you have to use real mayo to make this, not the lowfat stuff or Miracle Whip (gack!).

The recipe I use is from Cook's Country Magazine, from a printing that I clipped from a Bay Area paper a few years ago. It most closely replicates the Hawaiian macaroni salads I ate while on vacation in Hawaii.

Give it a go...Hawaiian Mac Salad is the perfect accompaniment for a plate lunch of Kalua pig, Huli Huli chicken or your favorite BBQ dish.


Hawaiian Mac Salad (from Cook's Country Magazine)
 
Ingredients

2 cups whole milk, divided
2 cups mayonnaise, divided (I like to use Best Foods Real Mayonnaise)
1 tablespoon brown sugar
1 tablespoon plus 1/2 teaspoon salt, divided
2 teaspoons black pepper
1 pound macaroni elbows
1/2 cup cider vinegar
4 scallions, sliced thin
1 large carrot, peeled and grated
1 celery rib, chopped fine

Instructions

1. To make dressing, whisk together 1 1/2 cups milk, 1 cup mayonnaise, brown sugar, 1/2 teaspoon salt and 2 teaspoons black pepper (or pepper to taste). Set aside.
 
2. Bring 4 quarts water to a boil in large pot. Add 1 tablespoon salt and pasta and cook until very soft, about 15 minutes. Drain pasta and return to pot. (You want the pasta to be fat and soft, not al dente)

3. Add vinegar and toss until absorbed. Transfer to a bowl. Cool pasta, then stir in dressing until well-coated. Cool completely. (Don't worry, the macaroni will absorb the dressing)

4. To assemble salad, add scallions, carrot, celery, remaining milk and remaining mayonnaise to pasta mixture and stir to combine. Season to taste. Refrigerate covered for at least 1 hour and up to 2 days. Serves 8 people.

Tuesday, June 4, 2013

Oven-baked Kalua Pig


Man, when did it become so incredibly HOT outside? I'm definitely not one of those people who loves the sweltering heat. What's there to like? Burning my hand on my steering wheel? Sweating like a pig? Ugh. If my little cottage didn't have CH&A, I don't know what I'd do. Seriously. I don't care if that makes me seem like an entitled brat. Whenever that thermometer starts climbing past 75 degrees, my air goes on- STAT. I would never survive in the South, where they have the double whammy of heat and humidity. I'm a total wuss. So this weekend when it reached over 100 degrees,  I tried to minimize my time spent in the kitchen. On Friday night, I convinced Mr. S. that we should go out to eat...I called it a date night but in all honestly, I just didn't want to cook. We tried the new Turkish restaurant on J Street, Istanbul Bistro. Not bad. The lamb beyti kabob was heavenly. The chicken shish plate...meh, probably wouldn't order that again. It was a bit bland and the portion was skimpy for the cost ($15).

Saturday night, I headed to the wilds of Rocklin for a wonderful get together of a few food bloggers in the area, including- Bake It With Booze, Guava Rose and Tate's Kitchen. There was such a delicious array of foods and cocktails. Man, can those ladies cook! I even got to try some tasty homemade orangecello that made my made my eyes bug out on the first sip. Those Bake with Booze girls aren't messing around with their booze. That orangecello may have put some hair on my chest, it was hardcore! I loved it though. :) Sunday was spent helping Kidlet #2 with his report (I now know more than I ever wanted to about FDR), reading  my book for book club (Home by Toni Morrison, which I'm enjoying immensely) and cooking. Yep, I said cooking. I cranked up the AC and ventured into the kitchen...and I even used the oven! I guess I just can't stay out of there. I thought a little luau food would be fun for the kidlets so I braved the heat and made Kalua pig, Hawaiian mac salad and coconut rice. The kidlets and Mr.S. loved it.  It was such an easy dish to make and pork butt is so cheap, I think we'll be making it more often. We even had enough for leftovers for the next day. Kalua pork is so versatile- you can throw the leftovers in tacos and quesadillas, stuff them into sandwiches and even toss some onto a pizza. It also freezes well. The only thing that would have made that meal better, would have been a GIANT mai tai. Um...for me (not the kidlets).

Kalua Pork

Ingredients

5 lb. pork butt, bone in
1.5 tablespoons Liquid Smoke
2 tablespoons of Hawaiian Alaea sea salt


Instructions

1. Preheat oven to 325 degrees F.

2. Score the pork butt on all sides.

3. Rub liquid smoke and salt onto the pork butt. Use your hands to pat it into the meat.

4. Place the pork butt on a large piece of heavy aluminum foil, fat side up. Wrap the foil tightly around the meat in a tent-like fashion. Place in a roasting pan or baking dish.

5. Cook for about 5 hours (about 45 minutes per pound of meat).

6. When it's done, remove the pork butt from the oven and let it sit, untouched, for another 10-15 minutes.

7. Open the foil. Remove the meat from the foil and shred the meat with two forks. It'll be really tender and will fall apart easily. You can also use some of the remaining roasting liquid to moisten the pork (optional). Serve.


Tuesday, May 21, 2013

Sweet, Fresh Summertime Strawberry and Farro Salad

My poor blog has been a bit neglected lately and I apologize. Things have been pretty busy here around my cottage and at Mr. S.'s casa. We now have the kidlets full-time so a lot of our time is spent hanging out with them. Lately they've been into bike riding, racing radio controlled (nitro and electric/lipo) cars as well as watching The Office and the X-Games. The full-time thing has been a bit of an adjustment  and definitely exhausting but it was nice when for Mother's Day I received this gorgeous lily plant from Mr.S., the kidlets and Pepper pup.


Kidlet#1 also made this cool card for me (on the right) at school. I'm still not quite sure what a rooster has to do with Mother's Day but I love it and it's on the fridge at my cottage. He's such a sweet kid. I can't believe he's starting high school in the fall!
 

Now this past weekend was a bit insane and I felt like I didn't get much sleep...but it was insane in a good way. My weekend started with an early wake-up, as Saturday morning I was volunteering at the the Mid-Century Modern Home Tour. I was stationed from 10am to 1pm in the game room (aka "The Big Lebowski Room") of my friend Gretchen's phenomenal Eichler home in South Land Park. I had such a fantastic time chatting with the folks that came through and learned all kinds of interesting bits of historical information about the area architecture and furnishings. One sweet gentleman even swapped me one of the Atomic Fireballs in my candy dish for a recipe on how to make a drink that tastes just like an Atomic Fireball (Fireball Whiskey, lemon juice and maple syrup).  The entire morning went by in a flash. After my volunteer shift, my friend Amanda and I went to check out a few of the other homes on the tour. I instantly fell in love with the backyard garden at the Skelly Duplex on Gilgunn Way. Such a great use of space! With it's lush greenery, bubbling water fountain and outdoor firepit, it's the perfect hideaway to curl up in and read a book during the week and soak in some tranquility. Then on weekends, you could switch it up and throw a fun, outdoor dinner party with friends under the stars. *Sigh* Now if only I could convince Mr. S. to build me a gazebo, a little garden studio getaway and an outdoor shower in his backyard like the ones I saw!


Hands down though, my favorite home on the tour is still Gretchen's Eichler. The vintage Ray-Gun collection, whimsical retro lunchbox display and sparkly Sputnik light- all  intermingled with the bright colors, clean lines and big windows- it just makes it such a fun house to be in; it's no surprise that it's been featured in Atomic Ranch magazine. Here's a few random pics I snapped of things that caught my eye:


For more info, check out: SacMCMhometour.blogspot.com or Facebook.com/SacMod

Now if all that hub-bub wasn't enough to wear me out, I had plans to go to Napa with my friend Michelle to see Adam Carolla and Dr. Drew at the Uptown Theatre that night. It turned out to be quite hilarious... even the fart jokes (ok, maybe I have been hanging out with the kidlets a leeee-tle too much).


Anyhow, amid all this running around, I found the time to make a new recipe...and it's oooh so good! It's made with fresh juicy strawberries, creamy goat cheese and some wonderfully nutty-tasting farro. I also threw in a handful of toasted slivered almonds for crunch and drizzled on some homemade vinaigrette to give it a nice subtle lemon-kissed taste.  You'll love it! It's the perfect quintessential summer recipe. Pack it to take on a romantic weekend picnic, whip up a batch to take to a BBQ with friends or you can even make some to have as part of your weeknight family dinner. (Which is what we did. I served it alongside some seared scallops mixed with morels and topped with a brown butter sauce. Ohhhh yeaaah!) By the way, if you haven't tried farro (pronounced FAHR-oh), it's good stuff! It's a grain that looks a lot like brown rice but has a lighter, chewier texture and a nutty taste. It's also rich in fiber and low in gluten. Farro's also quite easy to cook. You can use it as a replacement for rice in salads, risottos and soups.


Summertime Strawberry and Farro Salad

Ingredients

3 oz. slivered almonds

1 cup semi-pearled or pearled farro

1 basket (pint) of whole strawberries

3 green onions (white and lighter green portion)

1 cup baby spinach leaves

3.5 oz. crumbled goat cheese


Instructions

1. Preheat oven to 325 degrees. 

2. Take a baking sheet and spread the slivered almonds out in a single layer. Place in oven for 5-8 minutes. Flip and stir them about every 2 minutes. Keep a close eye on them as they can go from toasted to burnt very quickly. Remove them from the oven before they brown (remember they'll continue to cook somewhat once they're removed from the oven.)  Allow to cool. Set aside.

3. Rinse the farro. Next, bring 3 cups of water to a boil. Add the farro, cover and return to a boil. Then bring the heat down to medium-low and allow the farro to cook for 30-35 minutes. When it's done most of the water should be absorbed. If you have a little bit of water left, go ahead and drain it off.

4. Place the cooked farro in a bowl and place it in the fridge to cool.

5. While your farro cools- hull and quarter your strawberries, roughly chop your baby spinach leaves, and finely slice the green onion. (If the strawberries are on the smaller side, just cut them in half instead of quarters.)

6. Mix up your vinaigrette (see recipe below).

7. In a large mixing bowl, toss together the farro, strawberries, spinach, green onions and goat cheese. Drizzle the vinaigrette over the salad ingredients and mix well.
8. Serve cold.


Lemon-Honey Vinaigrette

Ingredients

4 tablespoons extra-virgin olive oil

4 tablespoons fresh lemon juice

2 tablespoons white balsamic vinegar

1 teaspoon honey

1-2 garlic cloves, minced

1/4 teaspoon sugar (optional)

salt and freshly ground pepper, to taste


Instructions

1. Place all ingredients in a small mixing bowl. Whisk together thoroughly.

2. Chill in refrigerator.
 
Fashion Trend © 2011 | All Rights Reserved | About | Privacy Policy | Contact | Sitemap